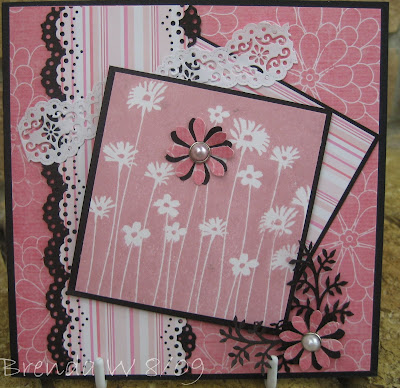
A quick share of a card I made this weekend just playing around with ideas, not really sure about it but I've made worse I guess.
The background was created with Tim Holz distress inks dusky concord, broken china and shabby shutters which I applied to a craft mat, spritzed with water then laid my cardstock over and allowed it to absorb. The image is a really old stamp JudiKins 2815H stamped with black Stayzon. I then added versamark from a one of those ink pens (I'm sure they have a proper name, but not a clue what it is so do hope you know what I mean) here and there to the image, added Sticky Stuff, heated and applied gold leaf. The sentiment is from a Stamp Barn cube. I also stamped the main card with bamboo from a Hero Arts unmounted set (sorry no codes) using versamark black and embossed with detail clear, the bleached out some of the leaves, although this does not really show up on my picture. Finally I added some oriental coins and cord.
Monday 31 August 2009
Cupcake challenge
Bank Holiday Monday and of course the weather is dull and grey and rain in the air.......what more could we expect in England ? So what else can one do than immerse themselves in a morning of crafting and as its Monday time for another Cupcake challenge which this week has a recipe: 3 buttons, 2 DP's and 1 ribbon.
So my card.......I decided to follow the weather and go Autumnal and used three of the stamps from one of the new sets from Inkadinkado 97513 which I stamped onto Basic Grey DP using versafine sepia (yes, you did read right, no embossing !). I 'roughed' the piece up a bit, distressed the edges with Tim Holtz brushed corduroy then embossed with detail copper......had to get the heat gun out somewhere. The backing DP is Hot off the Press which I stamped all over with Hero Arts H2365 French writing using Brilliance cosmic copper and again distressed the edges.
The five leaves down the side were stamped with the same brilliance and TH inks onto shrink plastic. Finally some flowers, the three requisite buttons and tied raffia - I used this instead of ribbon as it fits the theme of my card better and hope this is acceptable for the challenge rules........I will soon know if it's not, because they will throw me out of the Mr Linky list.
Sunday 30 August 2009
Rosie Dees sneak peek and reveal
Time for this weeks sneak peek of the new challenge at Rosies Dees and the reveal of last weeks card when the theme was "Sea", a place where we usually love to visit this time of year but the weather this summer probably means if you are like me, visits have been limited, unless of course you are fortunate enough to love close to the coast, which we do not.
I have used a lovely Stamps Happen image 80268 called "Linger by the Sea", it's quite an old one but I believe still available. I always find it a useful stamp for some of more 'difficult' cards - men of course !
I Glimmer Misted the background using midnight and a splash of rose tea for the sky, seafoam for the sea and sunflower and gold for the sand. The great thing about GM's is if you have a stamp in mind you can prepare and spray your card to fit with your image as I did here. I stamped very simply with versafine black and embossed with detail clear and did no colouring in at all as I felt the GM's gave it sufficient depth. The only addition was some dashes of Inkssentals white opaque pen to the waves. The DP is from my stash, the borders punched with Fiskars threading water, the letters cut on Cricut jasmine and finally the sail boat and lighthouse diamond glazed to lift them.
Labels:
Cricut,
Fiskars,
Glimmer Mists,
Rosie Dees Challenge,
Stamps Happen
Penny Black Christmas
Good morning one and all and a quick share of another of the yummy new Penny Black Christmas stamps making an appearance on the shelves at Sir Stampalots Christmas launch........for those of your that thought you missed out, fear not because it's running today as well 10 till 4.
This one is Penny Black 3992K.....first day of Christmas. I stamped the image with versafine black and embossed with detail clear, then pained with Twinkling H20s. It is actually quite sparkly, but afraid my picture is ot too good and it does not really show the sheen. The sentiment is PB 3995F.......yes, I am in love with this one at the moment, I just love the swirly font. Instead of ink I painted H2os direct onto the stamp then embossed with detail clear. You need to be a bit quick as the H20s dry quite fast, but I like the delicate finish.
DP is My Minds Eye, the border punch Martha Stewart embossed scallop and the lace came from a market stall in Livorno, Italy when we were on holiday - the Italians love their markets, and they also love ribbon and lace and little bags of buttons. I try to go to that stall whenever we visit there, it's like an Aladdin's cave and a totally different approach to selling haberdashery than the UK.
I would also like to say a big thank you to Kari for passing on this fabulous pink rose award. Kari makes some very pretty cards, so do go visit her blog.
Saturday 29 August 2009
Penny Black Challenge
Good morning to the bank holiday weekend everyone. A chilly start........I heard the heating click in for a few minutes in the early hours so I guess that's an indication that Autumn is close.
The gang over at the Penny Black challenge really have made life easy for me this week, the theme is Christmas. As as lots of you know, for the past week or so I have been creating Christmas cards with the new launch Penny Black stamps for Sir Stampalots Christmas launch which is running today and tomorrow. So needless to say this card is one of those.
The main image is Penny Black 30-036, the greeting 3995F and 3892K snow scroll which was one of last seasons releases. All are stamped with versafine black and embossed with detail clear and the angel coloured with Sakura pens. The punch is Martha Stewart embosses scallop and DP's My Minds Eye.
Labels:
Martha Stewart,
My Minds Eye,
Penny Black,
Penny Black Challenge,
Sakura
Allsorts week 16
It's Saturday and that means time for the new Allsorts challenge and this weeks it's Amanda's turn the select the theme and one to really make us think, no stamped image on your card.
So I decided to use the Cricut, it's been feeling a bit neglected lately other than being used for the odd greeting or shaped card. As I really like this santa and sleigh on the Christmas solutions cartridge I have based my card around him.
The background has been created with my favourite's.......yes of course, Glimmer Mists. I used silver as the base, masked a moon and eversparayed with midnight, denim and lemon zest, removed the mask and gave the whole piece a final spray of pearl. The church, cottage and trees are also cut on the same cartridge as santa from gloss black cardstock and the snowy roofs etc from a white glitter card. The greeting is from wild card. I added estra snow using diamond glaze and Judikins snow glitter.
Labels:
Allsorts challenge,
Cricut,
Glimmer Mists,
JudiKins
Friday 28 August 2009
Friday Sketchers
Well it's Friday, bank holiday ahead and the weathers is distinctly British.......at least it is here in the Fens, blustery, cloudy and rain looming. But according to the optician this morning Monday is going to be lovely - I certainly hope he is right.
Today there is a fab new sketch from Claudia over at Friday Sketchers, there was also the addition of a colour combo - Blue and Orange.......which I remembered after I had made my pink card.......something of a common trend amongst some of this week it seems. Luckily when I re-visited their blog it sad the colour theme was "optional" so I have stuck with my pink card girls.
My image is one of the fabby new cling stamps from Hero Arts CG105........when Andy (Mr Sir Stampalot) said try them out I was hesitant, but they are great and I am really impressed with the quality and of course they work out rather cheaper than wood mounted. I stamped simply with Hero soft blossom onto linen cardstock and matted up following the sketch with My Minds Eye and Doodlebug DP's. Border cut with Martha Stewart doily lace, leaves with L-Em and flowers with Woodware punches respectively.
Wednesday 26 August 2009
More Christmas Penny Black
Afternoon all.........now I know there are those that think I've been slacking today and rapped my knuckles for no posting.........not that I'm mentioning any names of course Dawn......................Ooooops.
I really have been so busy, I have finished the sample journal from the Tattered Angles Trunk Kit ready for classes next month........and what fun this was, yummy Glimmer Mists which come in the kit along with the journals, glimmer chips and stencils. And also a few more cards for Sir Stampalots Christmas Launch this weekend so sharing another of the cards I have created for this.
It's those little penguins again Penny Black K5260 and the greeting 3995F, all stamped with Memento black and coloured in with Promarkers. Again the DP's are My Minds Eye, the border cut with Fiskars threading water punch and the snowflakes on Cricut Christmas solutions cart, embellished with a button, string and diamond glaze on the penguins.
Labels:
Cricut,
Diamond Glaze,
Fiskars,
Memento,
My Minds Eye,
Penny Black,
Promarkers
Some fab new images
Just a quick post to say do have a look at http://hopejacare.blogspot.com/. Claire is a very talented artist and has just launched her own range of images using her own sketches. I'm sure we will see them popping up on challenge blogs in no time at all.
Tuesday 25 August 2009
Passion for Promarkers & Everybody Art Challenges
OK then, Christmas done for now........all this seasonal activity gives me the heeby jeebies so early but needs must and all that. So back to my botanical comfort zone and this weeks Passions for Promarkers using lilac, lavender, amethyst and aubergine using yet another gorgeous sketch from Bea at Everybody Art Challenges.
My main image is this so oh versatile image from Magenta 14315-0 which I have stamped twice onto white linen cardstock with versafine and embossed with detail clear and a third time onto acetate using stayzon black. The flowers stamped onto the linen have been coloured with the Promarkers, one image cut with oval Nesties through the Bug, the second and acetate images have had the flowers cut out, decoupaged and fixed with pearl brads. DP is Daisy Bucket and the greeting Art Impression G3130. Ribbon, a corsage of flowers and pearl stems added to embellish.
And I need to take this opportunity to say a big thank you to Lorraine a lovely blogging buddy for giving me this awad and such a pretty one at that.
Monday 24 August 2009
Cricut Expression machine going cheap
It's a very long story, but I have two cricut expression machines and it seems silly keeping one in my craft room and the other in the shed doing nothing when it's almost new and still boxed. So if anyone (UK mainland only please) is interested in one for £160 inc next day delivery please e.mail me from my profile. I can do a debit/card payment if that helps.
There are no cartridges to go with the one I am selling and obviously I cannot offer any manufacturer guarantee, but I can confirm I ran it this afternoon and it works fine, is still boxed and has the instruction manual and disk.
Stamping for the Weekend & Cupcake
The creative juices seem to be flowing back slowly and actually had quite a productive day or so after Fridays go slow.
Stamping for the Weekend has a colour combo this week of pink and grey. This is not a card is the strict sense of the word, more of a hanging decoration although I figure it could be given as a card......their blog does not say if anything other than a card is acceptable, but I am hoping it is, if not apols all, at least it was fun to make. It is also my entry for this weeks Cupcake challenge which asks for a shaped card.
As with my earlier cards I have made this with the new release Penny Black stamps for Sir Stampalots Christmas Launch next weekend. I have used my little goose stamp again Penny Black 4008J, stamped onto pale pink bazzil three times and cut out with Nesties on the Bug in graduating sizes. The mats have been cut the same way from grey bazzil and My Minds Eye DP's from their new Christmas range.
The images have been lightly coloured with Promarkers and the geese glittered with crystal glitter. A couple of leaves cut with my L-Em punch, a button and ribbon added to the largest circle to embellish and all mounted onto ribbon and the reverse also has circles backed on to the front ones to give a neat finish.
Sunday 23 August 2009
Rosie Dees challenge
Time for this weeks sneak peek of the new Rosie Dees challenge which goes live today along with the reveal of my DT card for last weeks challenge where the theme was "Sun". Lots of entries this week and it's been fun visiting all your blogs.
Here's what I did to create my card, a bit offbeat perhaps but I had the idea of the large sun and worked out from there. I used gloss cardstock and created the sun by cutting a circle in a piece of A4 paper on the Cricut, placed it on the cardstock and brayered over the aperture with Stayzon sunflower and pumpkin. To create the mountains I tore a piece of copy paper and laid it on the cardstock (from the top downwards if that makes sense - so you are covering the top section of card) and brayerd first with hydrangea, moved the torn piece down and across to give a more random finish and brayered again with violet. Note: I find it best to roll the excess off the brayer on a piece of scrap paper first so the colour is softer - you can always go back and built it up if you want a more intense finish.
From there on I stamped birds, trees and leaves with Art Impression G3232/G2770/B3020/AA891/F2055. The castle is Artstamps F0047M and the fairy Rubberdubberdoo (no number afraid). I added stickles and glitter and punched and threaded three butterflies across the bottom.
ABC Challenge
This weeks ABC Challenge ask that we add buttons to our project, so this gives me the opportunity to share another of the sample cards I have been working on for Sir Stampalot's Christmas Launch next weekend using the fab new release Penny Black stamps.
Well, it's cutsie again......need to watch myself here this could be a new addiction. This one is Penny Black 4008J stamped stamped with versafine black and embossed with detail clear, once into the aperture cut with Nesties though the Bug and a second time cut out and decoupaged. Both were coloured with Promarkers and glittered with crystal. The holly is from Penny Black Banner of Joy, another of the new releases which I stamped onto shrink plastic and coloured with brilliance inks before shrinking. The DP is again one of the new Christmas designs from My Minds Eye, the edge punches with Martha Stewart snowflakes, ribbon and buttons added to embellish. The greeting is the same one I used on yesterdays card, Penny Black 3995F.
Labels:
ABC challenge,
Brilliance,
Cuttlebug,
Nestabilities,
Penny Black,
Promarkers
Saturday 22 August 2009
Friday Sketchers
Another great sketch at Friday Sketchers this week which I have used to create another card for next weekends Christmas Launch at Sir Stampalot with the new release Penny Black stamps.......the new release Hero ones are still in the box waiting, but promise to share some of what I do with them as soon as I get there.
This card used the poinsettia from Penny Black 30-036 unmounted set. I love to work with poinsettias as they lend themselves so well to decoupage which is what I have done here. Stamped with versafine black and embossed with detail clear three times onto vellum. The circles were cut with Nesites on the Bug from My Minds Eye DP's. The swirls across the bottom were stamped with black Stayzon using another new set from Inkadinkadoo 97513......I need to do more with this set as it has some gorgeous leafy swirls and tree.
I stamped the poinsettias several times more onto shrink plastic and some holly from the Penny Black set as above.. All were coloured with Brilliance.......I add it straight from the pad to the plastic, this is such a quick and easy way to colour your images before shrinking if you want colour and not too much detail is required. Finally, gems added to the large poinsettia and a greeting.
Penny Black challanege
After a mare of a day crafting yesterday, today can only be an improvement. Yesterday was one of those days where everything I made went wrong.......like adding diamond glaze then standing my card upright......know what I mean ?......and so my day continued.....typical when I so desperately wanted to play with the new release Penny Black stamps and get samples made for Sir Stampalots Christmas Launch next weekend.
So this morning I buckled down and am making headway and have even made one that will fit nicely with this weeks Penny Black challenge where some form of stitching or faux stitching is required. I gave my sewing machine away to one of my son's girlfriends last year when my eyes reached the stage where I machined a finger.......decided it was an omen. So my 'stitching' was created by one of those little pink runners that make holes in your cardstock.......what they are called I have absolutely no idea and a confession it's not even mine.......sorry, keep forgetting to return it........then I joined up the dots with a black pen......who remembers those books where you could make pictures like that ?
My image is such a cute teddy Penny Black 4015K......I know I don't do cutsie often and even Janice was surprised when I chose this one, but I could already see his shiny boots in the snow.......such an example was the cause of the bodged diamond glaze yesterday. I've made several with him now and love him. I stamped him with versafine black, embossed with details clear and coloured with Promarkers. I also stamped his hat again to decoupage and add a fluffy bobble with Liquid Applique. The DP is one of the new Christmas range from My Minds Eye, they are all bright colours and make a lovely change from the traditional......mind you, number one critic - hubby - doesn't share my enthusiasm, he's very much a traditional when it comes to Christmas colours. Can't please them all.
The border strip and corners were cut with Fiskars threading water punch and the greeting is another new one from PB 3995F (cut in the middle to make two words) . I absolutely love this one, super script which lends itself to both modern and traditional. To finish I added 'snow' with JudiKins snow glitter, diamond glaze to his boots, ribbon and gems.
Allsorts Week 15
A huge thank you to everyone who entered Allsorts challenge this week for my English Country Garden theme which many of your kindly told me you really enjoyed.
Now we move on to week fifteen and it's the turn for our new teamie Jules to select the theme where she asks us to follow her sketch plus some torn edges - it can be just one edge or lots of edges - just tear your paper as much as you dare. Wow, now there's a challenge, are you up to tearing your beloved DP's I wonder ?
I have started with a dark geen card which carries the background colour of my DP of which I do not know the make as I purchased it last year for a rather special card and this is the leftover. My image is a swirl from Inkadinkado 97632 stamped with Stayzon olive, dusted with chalk to tone the cardstock down and cut out with Nesties through the Bug, along with the mat using Bazzil. The roses are Magenta Tilda range stamps (they came as a set of two) wich I stamped onto vellum with Memento ink and coloured in with Promarkers. The greeting stamped onto vellum again with the olive ink is Art Impressions E3145 and held in place with two pearl brads. Finally three pink pearls to fit in with Jules sketch.......in a different place as this seemed to fit my layout better, hope you don't mind the alteration Jules.
Thursday 20 August 2009
Passion for Promarkers
Passion for Promarkers have given us a double whammy this week, to use Pumpkin and Prussian but with the twist of Halloween. Panic.......I don't have a single Halloween stamp, so it had to be done......a trip to Sir Stampalot, well what else was I supposed to do placed in that position ?
Actually I did have a bit of an excuse as they had goodies there waiting for me to collected. And when I got there it was like Christmas come early, a lovely delivery van was just arriving with a Hero delivery, so cream cakes at the ready as Andy set at unpacking. Soooooooo exciting they are all piled up ready for the big Christmas launch I mentioned earlier in the week 29 & 30th August 10 through 4 both days with lots of demo's, new products etc.
On to my card, a brand new Penny Black stamp 3716K stamped in versafine black and embossed with detail clear, coloured in with the two requisite Promarkers and they really do go very well together and cut on the Bug with Nesties. The little owls are Hero A4942, leaves cut on my L-Em punch and border with Martha Steward arch lattice. DP's are Doodlebug an finally ribbon, some star gems and a small charm which was silver, so I inked with brilliance blue and embossed with detail clear to match my card.
Wednesday 19 August 2009
Tutorial - Glimmer Mists
Well here we go, GM tutorial by special request, this is instalment one........instalment two to follow in a day or so when I muster up the enrgry to draw it all together. Can't believe I'm actually doing this and have to say right at the start I don't profess to know all there is to know about GM's, I just enjoy using them and am happy to share what I have learnt with those of you that have perhaps not yet ventured into the realms of these super duper sprays........can you tell already that I love them ?
1) I always use a large silicone mat, most good craft store sell them as do Lakeland (baking sheets) - always store it rolled, not folded, otherwise you will end up with horrid ridges that the ink runs into and all of that can be used again if your surface is flat. You can use newspaper, but then you waste all the overspray (I'll explain later).
Now is perhaps the time to say when you look at a piece such as the one on the left you might want to bin it because it's a bit messy. Don't because by the time you have stamped onto it everything blends together and the imperfections fade into the background.
Having never done this before my worry is that I may not provide sufficient clarity or worse bore you to tears with too much blather, but will do my best and leave it to your honesty to tell me ! I decided it would be easier if I do two tutorials, the first with the basic techniques and another moving onto using stencils with GM's. All of this will be far from exhaustive, I'm still on the learning curve as well.
I have been using GM's for a year now and using them in classes and the novelty still hasn't worn off which is quite something with new crafting goodies. I have tried most of the 'similar' products on the market but in my opinion none compare with the intensity of colour and shimmer......that's the bit that comes from the high mica content in them.
First things first, preparation:
2) Lay out everything you will need, GM's, kitchen towel, cardstock.
3) Select the colours you want to use - in reality they all blend together, but some definitely lend themselves to one another better thank others such as Honey Dew Mist and Lemon Zest, Timeless Lilac and Kiwi, Seafoam or Turquoise with Sandy Beach or Vanilla. We all have our preferences and these are just mine but will provide a good basis for starting your collection so you get best use out of your GM's. There are also two essential 'special' sprays that in my view everyone using GM's needs in their stock - Iridescent Gold and Pearl, these are white/cloudy to look at but added as a final spray give the finishing shimmer and blend the colours.
Priming your GM's:
Priming your GM's:
When you look at a bottle of GM you will see sediment in the bottom, this is the mica - shimmer element. Even if it is only a few minutes since you last used a bottle, you still need to follow this procedure as the mica settles very quickly. Roll the bottle between your hands until you see movement of the mica then shake vigorously until the sediment is all incorporated into the liquid. This may sound like teaching you to suck eggs, but do make sure the top is on, you wouldn't believe how many times I have seem someone shake without the top on and I guess you can imagine the result - GM's ceilings can be nice if you like that sort of thing I suppose !
Basic Spraying technique:
The effect you create will be dictated by the way you spray and the height from which you spray. A swift left to right movement with the bottle held about 12" above your cardstock with gentle pressure on the nozzle will produce a nice fine misted effect The lover you move to the cardstock the thicker the intensity of colour.
People often ask me why they get a 'blobby' effects regardless, but this is usually down to technique. This picture shows where you finger should be placed on the top of the bottle, any further forward the spray will hit your nail, drop down to the card and this is what creates the 'blobs'.
Start with the palest colour first and build up with your darker colours. With practice is is quite easy to create a 'custom' piece of cardstock with colours where you want them like on this card or this one for example. Alternately spraying randomly you can create pieces like this one and some fantastic colour blends can be achieved.
A note on drying, you can use a heat gun to speed it up but if you have a lot of GM on your piece it's likely to make it run across the card, so try heating from the back. I prefer to let it dry naturally as it takes half hour at most. I tend to line them all up in the warmest place which is the conservatory in the summer (dog paw marks can be nice if you put them on the floor as I did last week) or across a radiator. You can see the mica twinke in the sunlight as it dries - little things !!
Using your 'Two Special Sprays':
Once you are happy with your colourways, this is the time to use your two 'special' sprays. There are two ways to do this, you can either spray immediately after spraying the other inks and you will see rapid bleeding of the colours which blends them together. Alternately, allow your carstock to dry and then spray with your 'special' spray, this will still persuade the inks to bleed but in a far more subtle way. The two samples below have both been sprayed with Lemon Zest and Honey Dew Mist. The one of the left was given more of the two main colours and Pearl sprayed on when wet. The one of the right had a lighter spray of the same two colours, was left to dry and then sprayed with Pearl. Two totally different effects.
Now is perhaps the time to say when you look at a piece such as the one on the left you might want to bin it because it's a bit messy. Don't because by the time you have stamped onto it everything blends together and the imperfections fade into the background.
Obtaining a softer finish:
If you prefer a softer finish, follow the basic spraying technique above but immediately after spraying dab it with a piece if scrunched kitchen towel. This produces a lovely base for adding more sprays from a similar colour family to achieve a nice mottled finish. I will cover this again in my next tutorial using stencils.Never waste a drop:
After a spraying there is inevitable a residue of ink on your silicone mat, never ever waster this. I always keep lots off offcuts ready and place them onto the mat to soak up the ink, if you squish your cardstock around you will pick up most of it. The same process can be followed after each colour has been used and you can end up with some fantastic colour combos quite by chance.
Maintaining a good even Spray:
Sometimes the spray nozzle blocks and you get a blotchy spray. You can easily clear this by unscrewing the top and running it under cold water.
Maximising effort:
Lots of people tell me they can't be 'faffed' with GMs' because they are messy. That's all part of the fun, but they are only as messy as you make it and if you prepare property the clear it all away as soon as you finish the mess is minimal but the satisfaction element great. I tend to have a 'GM session', get the whole lot out and spend an hour or so creating a stockpile ready for use.
Colour bends and results:
There is no limit to the wonderful finishes and effects you can achieve with GM's and below are just a few examples. The top left was done using black cardstock with Rum Raisin, Timeless Lilac, Gold and final spray of Iridescent Gold. Top left is onto white cardstock using Pink Bubblegum, Black Cherry adn Timesless Lilac, then run through the bug using birds and swirls folder and a final spray added of Pearl. It's always difficult to get the shimmer in pictures, but believe they all have a wonderful sheen.
The bottom left is for a project I am working on but afraid you will have to wait until Sunday to see it as it's some of my DT work. Colours used here are Midnight, Rose Tea, Seafoam, Sunflower and Gold. I sprayed this piece to tie in with a stamp and with careful panning it fits 'what I needed where' perfectly. The bottom right piece was stamped with versamark and embossed with detail clear before spraying to create a resist effect, then sprayed with Coral and Gold.
So in conclusion after completing my 'novel' I hope this will help some of you, inspire others to buy some GM's and have some fun and those of you who fall into the 'faff' category to give it another go and I would love to see what you create. Please do have a wander around my blog and look as some of the samples using GM's - the link on the sidebar is probably the quickest way to find them and feel free to ask me any question you have.
Inspirational Card Sketchers and Creative Card Crew
Well I'm chuffed to bits that you seem to be liking the idea of a Glimmer Mist tutorial, I've even had a few PM to egg me on, so I shall continue to work away at it. Did some pictures first thing, now I need to get everything into an understandable format.......how possible that will be when I even confuse myself half the time remains to be seen, but if you don't try as they say........... I am trying to use the same principal as in class and go through it step by step but not really sure if that will work, we shall see !
So in the meantime this is what I can up with for this weeks lovely sketch by Olena at Inspirational Card Sketchers - I like working with squares so I naturally love this one and have combined it with this weeks Christmas in August theme from Creative Card Crew.
Gives me the chance to get out the new Christmas Penny Black stamps again and do a few more samples for Sir Stampalots big Christmas launch weekend which is running over 29th & 30th August 10-4 both day. Lots planned including in store demos, all the new Penny Black, Hero, Mangenta, Tilda etc products and 'on the day specials' as well. Make a note in your diaries. And you can bet on some eats and drinks as well to keep your energy levels up - well crafting can be exhausting, especially choosing all those new goodies.
The snowflake stamp is PB3933H and the DP's Joly Holly from Fancy Pants. Main image is stamped with versamark and embossed with detail white. The corners on the squares were cut using Martha Steward doily lace punch and the corners of the main card run through the bug and embossed with one of the fancy corners folders. Poinsettia flowers made using a punch and gems added to embellish. It's a pretty simple card, but sometimes that's all it takes and I quite like the finished article.
Glimmer Mist info and Bernie and friends
Morning all. I know I promised more pictures of Bernie and the labs but how many of you have tried taking a picture of a St Bernard's and three Labradors and getting them all to stand still ? Believe me it almost impossible, plus Abbey is in a 'delicate' state at the moment and George is more than a little interested in her if you know what I mean......... so she ducked out of this one and it's just the big boy, Buffy and George.
For those of your who may be interest, I'm working on a sort of tutorial using Glimmer Mists. Over the weeks I have been asked by several bloggers about using them and I always try and PM to give some help. This made me realised that whilst lots of us are familiar with them, equally there are those that like the idea but have not taken the first step.......after all they are not cheap and if you are going to make the investment it's nice to have some idea how to work with them and as a lady pointed out to me yesterday it would be helpful to know other things like what colours make up a good colour combo so you can target your purchases. So the camera is out, so are the GM's, the silicone sheet is in place and I shall set to work this morning and see if I can come up with something that can be posted up.
Tuesday 18 August 2009
Vintage Penny Black
After two days back home have eventually managed to get at least one card completed........spent yesterday working my way through a mountain of work waiting on my desk in the office - yes I do have to do real work occasionally. But on the positive side did manage a couple of cards last evening, one met the bin post haste, the other I am a little happier with and fits the bill for this weeks Penny Black challenge which requires you to use Blue, Tan and Cream and Stamping for the Weekend which has the theme"Days Gone By - Vintage!
My main image is Penny Black 3865K stamped with versafine sepia and coloured in with Promarkers, overs tamped with Hero H2365 French Script using Tim Holt scattered straw. DP's are Bobunny and K&Co. I distressed the edges of the main piece with the same TH ink and rolled the ends to create a scroll effect and scrunched and tore the edges of the blue piece and again shaded with TH ink along the edges. Finally I added a corner embelli, some flowers, lace and gems.
Sunday 16 August 2009
Rosie Dees Challenge
Think I messed up a bit with my sheduled posts for our hols as seems I did not do one for this weeks Rosie Dees challenge, so sorry everyone, but am putting things right now with the reveal of my last card and this weeks sneak peek.
The theme for this one was "The Beach". The image I used is one I have had for years and although it's wood mounted has no identity I'm afraid. The background was created with Glimmer Mists, denim, grey, seafoam, pineapple and sunflower. I added some 'waves' using Inkssentials opaque pen, stamped Judikins 'sand' across the lower section to give the effect of dunes and Art Impression AA1038 (stones) and AA1378 (grass). The girl is coloured with Promarkers and her dress overstpamped with Art Impression B3023 flowers then decoupaged. Birds are Art Impressions G3235. The corner has been punched with Martha Steward embossed scallop, gems added and Daisy Bucket DP.
And finally, here is a sneak peek of this weeks new challenge. Do pop over and see the DT's fab inspiration and look forward to seeking your creations.
Back Home to meet Bernie and an award for all my blogging friends
Good morning one and all, well where do I start ? The holiday was fab, Mr Blogger played along and I want to say a huge thank you to all my blogging buddies for continuing to visit me........and leaving me so many awards which I deal with shortly.
But a bit of news first, the fellow in this picture is called Bernie and he was here to greet us when we got home. One of our sons has agreed to offer a home to Bernie who is four and came from the RSPCA rescue centre. It sounds as though he's had a pretty traumatic life so far and much as we were surprised by his arrival, you all know me and animals ! The three labs look so small against him but seem to be getting along OK, so now we all need to help build Bernie's confidence - he's afraid of the dark, very quiet and needs lots and lots of love, so he's come to the right place.
This picture does not really give credit to Bernies size so planning one or two with the labs to get things into perspective and will post later.
As I have said lots of times before, I find the passing on part so so hard and I know lots of your share this problem. I would really like to pass these awards on to all the lovely people I have 'met' through blogland as a thank you for their continued support and encouragement.
I know I am repeating myself here, but I believe crafting is a continual learning curve and we all draw inspiration from one another, that's what it's all about. I know I am a coward for avoiding the decision making so instead of passing these awards on individually, they are awarded to all my blogging friends........this might not be in the 'rules' but will give me so much pleasure and hope those visiting will fee able to accept and lift one (or more) as a personl thank you from me.
Now to the nasty part of holidays, washing and putting everything away, then hopefully some crafting. I usually find it really hard after a holiday and the creative juices run a bit slow, but I do have some new products waiting to be used so am hopeful they will help Mr Mojo get back into action quickly. And I do have my Rosie Dees challenge card and sneak peek to post which I did before the hols so will post that shortly to get things moving along.
Saturday 15 August 2009
Allsorts challenge 14
And this week it my turn to choose the theme at Allsorts and surprise surprise it's got a botanical theme entitled "In an English Country Garden". And a fab prize of a gift voucher to spend at PDA card and craft, do go check them out, they sell the most exquisite cardstock, great value envelopes, card packaging, beautiful vellum's and so much more including a whole range of other craft goodies.
Now this doesn't have to be flowers and butterflies you know, it can be afternoon tea, teddy bears picnic, cuties playing tennis on the law, you decide what it means to you, that's what makes challenges such fun. And hopefully, if the Bay is kind I'll be back home and along to check out all your creations on your blogs. And I also want to say thank you to Chris at Craftings Cosy Corner, I love her style and her inspirational use of flowers.
Now, aplos in advance, this is going to be a bit lengthy me thinks.........I based my card around Shakespeare's Sonnet "Shall I compare thee to a Summers Day" ........ yes I love poetry as well and created a myriad of colour, fauna and of course butterflies starting with colouring a piece of carstock with Tim Holtz inks. I used dusky concorde, worn lipstick, mustard seed, spiced marmalade and shabby shutters, working them with a blending stick then drenching with water to make the colours bleed. When dry I spritzed with pearl Glimmer Mists.
Lots of stamping using dusky concord again - flowers - Penny Black 2666K, 3379H, Stampendous N152, diamond block Hero G3318 and Art Words G2678 which I stamped with versamark and dabbed over green chalk.
The poem is Hobby Art GR1341F again stamped with dusky concorde anf the tiny butterflies intermingled are from Penny Black 3--304 stamped with versamark and dabbed with pale pink chalk. The swirl is from Inkadinkado 97632 and butterflies made using a punch. The border is bazzil punched with Martha Stewart doily lace. Finally a corsage of flowers and pearls tied together with cord and garden twine and words printed on the computer.
Friday 14 August 2009
More Magenta
All good things must come to an end they say and by the time Mr Blogger posts this one we will be leaving our last port of call in Northern Spain and heading homeward.......I really hope the weather has improved since we left because we sure are going to be cold otherwise.......just prior to us leaving the UK at the end of July as I schedule this post, temperatures in the Mediterranean were in the last 30's and early 40's, warm or what.
This is a really quick and easy card created for Sir Stampalot using Magenta 41017.K. The background for the stamped sections were created using Stayzon pumpkin, sunflower and citrus, sponged onto gloss cardstock. To create a softer look and to 'persuade' the colours to blend I spritzed with water. When dry I stamped with versafine black and embossed with detail clear. The other two sections are bazzil cardstock run through the Bug using the script folder. Some cord, a flower and brad added to embellish.
Wednesday 12 August 2009
Parisian influence
Realised as I spend the day scheduling these posts that I'm also giving you a bit of a European tour as well, do hope I'm not boring you all to tears ....... probably come back to an abandoned blog ? Today we are scheduled to dock in Lisbon at 8am, quite a spectacular entrance to this Portuguese city under the huge de Abril bridge, 2.2m wide spanning the Tagus and alongside the Cristo Rei statue which is a replica of the one in Rio. Tomorrow we head to Vigo in northern Spain.......the seafood restaurants that line the streets are sometning else, can't wait.
This card is one I made for a friends birthday and as I rather liked it ended up making a couple more very similar. My main image is Stamps Happen 80436 stamped as is my norm with versafine black and embossed with detail clear and coloured very lightly with Marvy pens. The wording is a Hero background stamp Life and beauty G2678. The DP is Scrappy Cat and I added some lace, a feather, flowers, pearls and ribbon.
Labels:
Hero Arts,
Marvy le Plumes,
Scrappy Cat,
Stamps Happen
Monday 10 August 2009
Onwards to Spain
Goodness, I do hope Mr Blogger is going to play ball with me and all these schedules posts. This is the third of the Lavinia stamps - details on earlier posts - cards created before we travelled. Yesterday on our itinerary was Cagliari, Sardinia, never been there before so not a lot I can tell you about it yet, but have been to Cadiz in Seville before which is our next port of call. History claims that Hercules founded Cadiz which was a favourite haunt for pirates........so much so that the streets were specially designed in an intricate gridwork to deter them.......no idea if the theory worked though ! The city has a fantastic Cathedral and boats some spectacular Baroque architecture.
The background for this one is Glimmer Misted with patina, turquoise and pink bubblegum and some texture added by inking through some mesh fabric and embossing with detail gold. The fairy word background is also from Lavinia and stamped with Tim Holtz soft blossom and the small fairies stamped onto the background offcuts and their wings glittered. Bottom scallop and corner is Martha Stewart doily lace, ribbon and gem brads added down the side.
Labels:
Glimmer Mists,
Lavinina Stamps,
Martha Stewart
Subscribe to:
Posts (Atom)