Showing posts with label Lavinina Stamps. Show all posts

Saturday, 6 August 2022

In the Forest so green


Morning everyone, time for another challenge at Allsorts and it's the first of two which will run for two weeks during August. Lorraine would like us to create our own background, inks, stencils all manner of options there. There's a prize of a £15 store voucher from WOWVOW.

Not a new make above, but not previously blogged and one I enjoyed making as I am right at home creating backgrounds, in fact DP's terrify me. To begin with I can never choose and once I do I'm never quite happy with how it looks alongside my stamping.

All stamps are Lavinia stamped with Versfaine Claire onto the Oxide background and circle masks used to create the moon with auras.


My second card using the Freesia from one of the new AALL and Create releases called Delight in Flora. Background brayered with two shades of Oxide,  the focal element stamped, some stencilling and stamped script (second generation), the bloom paper pieced using an inked offcut, along with the sentiment and letter F onto a punched circle which I covered with Glossy Accents and matching envie. The set is not loaded onto the A&C website yet, but is available from Create and Craft here.

And one final share which was for Hightlight Crafts using lots of Two Red Robin dies to create a summer meadows scene.


Have a lovely weekend everyone.
 
Those leaving a comment on any post on this blog do so in the knowledge that their name and blog link are visible to all who visit this blog.

Saturday, 13 November 2021

Foxy on the prowl and a Winter Butterfly


Morning Peeps, it's Saturday so a new challenge at Allsorts where Wendy is thinking all about Christmas. Our prize is a collection of seasonal ribbons and glitter and three images from Ruth Hamilton Design.  

To create this one I used several Lavinia worker stamps to create a partial wreath, stamped Lavinia Trees and Fox into the wreath, a masked sun, trees and shading and a Christmas sentiment which I think just might be from Inkylicious. I also made an envelope to match.


My second card is very much hot off the press as Ruth only finished this image yesterday so my card is a bit of a rushed one but I wanted to be able to show you her beautiful Winter Butterfly. On the Allsorts challenge blog I have also added the photos of Ruth's creation which inspired the image.

Have a good weekend and may thanks as always for popping in to take a peek.
 
Those leaving a comment on any post on this blog do so in the knowledge that their name and blog link are visible to all who visit this blog.

Saturday, 5 December 2015

CAS at Allsorts


Good morning to you all, it's time for our new challenge at Allsorts where this week I am the host and would like to see CAS style cards. Our sponsor is Scrapper Delight

I don't think I am alone when it comes to making CAS style cards and I hope I've not overdone it on these two, but to me they are fairly minimalistic.  The card at the top uses an image from our sponsor called Fairy Wishes and have to confess it was a really quick and easy card to make. I printed the image onto white linen cardstock, used Wink of Stella pens to add some colour and sparkle to the fairies wings and bubbles and gently shaded the edges with distress ink. The sentiment is a stamp from Lavinia and one I do rather like and seem to use quite a lot.

The starting point for my second card was to mask a section on the card and apply Pan Pastels, then remove the masks before stamping the Penny Black bloom and sentiment. I matter the piece onto some coordinating card and black base card. I have to say these cards were both really quick and easy to make and ideal if you need lots in a hurry.


Happy weekend all and I hope you will join in our challenge this week.

Saturday, 9 March 2013

Beautiful spring


Saturday means a new theme at Allsorts and this week another of our new team mates Wendy is hosting her first challenge with us with the very seasonal theme of Springtime.

It's my favourite time of year and I just love making cards with all the fresh and pretty spring colours. The one at the top uses Ruth's Pick of the Bunch rose punch and stamp set and although daffodils are not one of the intended flowers for this set, I found that by turning the petals the other way round I could come up with a reasonable daffodil. I used a Penny Black image in the centre of the Marianne die set and cut some leaves for the daffodils from Bazzil cardstock.

Hubby.......my biggest critic..........suggested the centres of my flowers were not quite right, but after spending some considerable time looking at images on the Internet I found some varieties do indeed have little stamens inside the trumpets.


And I just had to do another card as I wanted to do one with spring bunnies, this pair are a Lavinia stamp, and I created a little scene around them with blossoms and flowers, coloured with Pan Pastels and popped a Chocolate Baroque bird into the corner. And when my 'critic' saw me taking photos of this one he said 'Is the theme Watership Down then'..............I didn't deem that worthy of a polite response !

Have a lovely weekend everyone.

Sunday, 24 February 2013

Shining light


Afternoon all, I'm here with my mid month inspirational share for Craft a Scene challenge where it's all about Lighthouses this month and the theme 'Let your light shine'.

When I did my DT pieces I really did think I only had one lighthouse so both my pieces this month feature that one, however I have since discovered a sadly neglected Stamps Happen one........in fact a whole draw full of lovely wood mounted stamps from that company so I think it's a sign that I might have a few more stamps than I really need. ?

Anyhow, to create this one I used a Stampscapes cumulus stamp for the sky along with an Art Impression boat, lighthouse, rocks and gulls and a Lavinia tree using just the edges across the top corner. All colouring has again been done with Pan Pastles.

I hope you enjoy the rest of your Sunday.

Sunday, 2 December 2012

More trees


Good morning to all my crafty friends, it doesn't seem possible that these are our last monthly challenges of 2012, so where did the year go ?

It appears that all of my DT pieces are rather scenic........... yet again I hear you say, but unless I've got a clear directive I always seem to revert to my comfort zone of creating little scenes with a good few trees thrown in for good measure.

The good thing is I think some of this months themes can be quite easily combined so hopefully I'll see you popping up at several of the challenges this time around.

The top card is my DT creation for Penny Black and More challenge where we have the theme 'It's Your Choice' and it's really quite a simple make, a piece of card stock masked top and bottom, Pan Pastels blended with a masked sun and over stamping in black archival with Penny Black stamps........... all listed on the picture thumbnail links below.


My next piece is the first of my Stamping Sensations DT piece where our theme is 'TreeMendous'........it's not as scary as it sounds as I think everyone has a Christmas tree stamp lurking somewhere..........using the Three Tree Trio from this months sponsors Visible Image who sell a fabulous range of good quality clear stamps. Some soft shading with Pan Pastels, a touch of snow glitter and a Lavinia stag stamp.


The card above is this month DT piece for Craft a Scene challenge, again soft sponging with Pan Pastels, some trees and the little cottage is from this month sponsor Robyns Fetish


Phew, nearly there this is my second piece for Stamping Sensations using a gorgeous large tree from Chocolate Baroque, smaller tree which is Stampscapes as is the fence and the little sheep are from Art Impressions which I gave a fluffy coat with liquid applique.


And finally just one more....................... yep, I could make tree cards all week and this is another one using the Three Tree stamp from Visible Image, this time embossed with Frantage plus some more around the edge of the base layer. The white trees were embossed with detail clear and then the whole piece distressed with TH mowed lawn, tea dye and a little over stamping round the edges with some music and holly stamps.

Enjoy your Sunday and thank you so much for dropping by.


Tuesday, 20 November 2012

Pan Pastels questions answered


Good morning Peeps, although looking out the window is not so good out there, it's been throwing it down all night and the winds been "blowing like a good un" as we say here in the Fens.

Welcome to my new followers and thank you to everybody for your comments and don't forget everyone  who leaves a comment this week (or comments - each one will go in the draw) will all be going into the pot for my draw at the end of the week for the four sets of beaded pins here


I had a very indulgent crafty weekend and thought I would share a couple of the finished projects. With the exception of the Lavinia bulrushes and Art Impressions geese, everything else is Stampscapes and all colouring has been done with Pan Pastels.

On the subject of Pan Pastels, I've had an awful lot of questions about using them and whilst I don't confess to be an expert by any means, I thought it might help if I try to cover a few which seem to come up frequently, based on my own experiences of using them.

(Note added, you will also find my Pan Pastel Q&A on the company's web site and Facebook page).

Q) Do you need to seal/set them ? 

A) As far as I'm concerned the answer is no and I know that's also the view of Kay from Indigo Blue which is good enough for me. I've been using them in both demos and for personal use for several months now and not one of my samples has shown any sign of the Pans shifting and they have been well handled in that time. In fact when I finish a piece I always rub over it with gentle pressure using a piece of kitchen roll and that seems to help fix them in place.

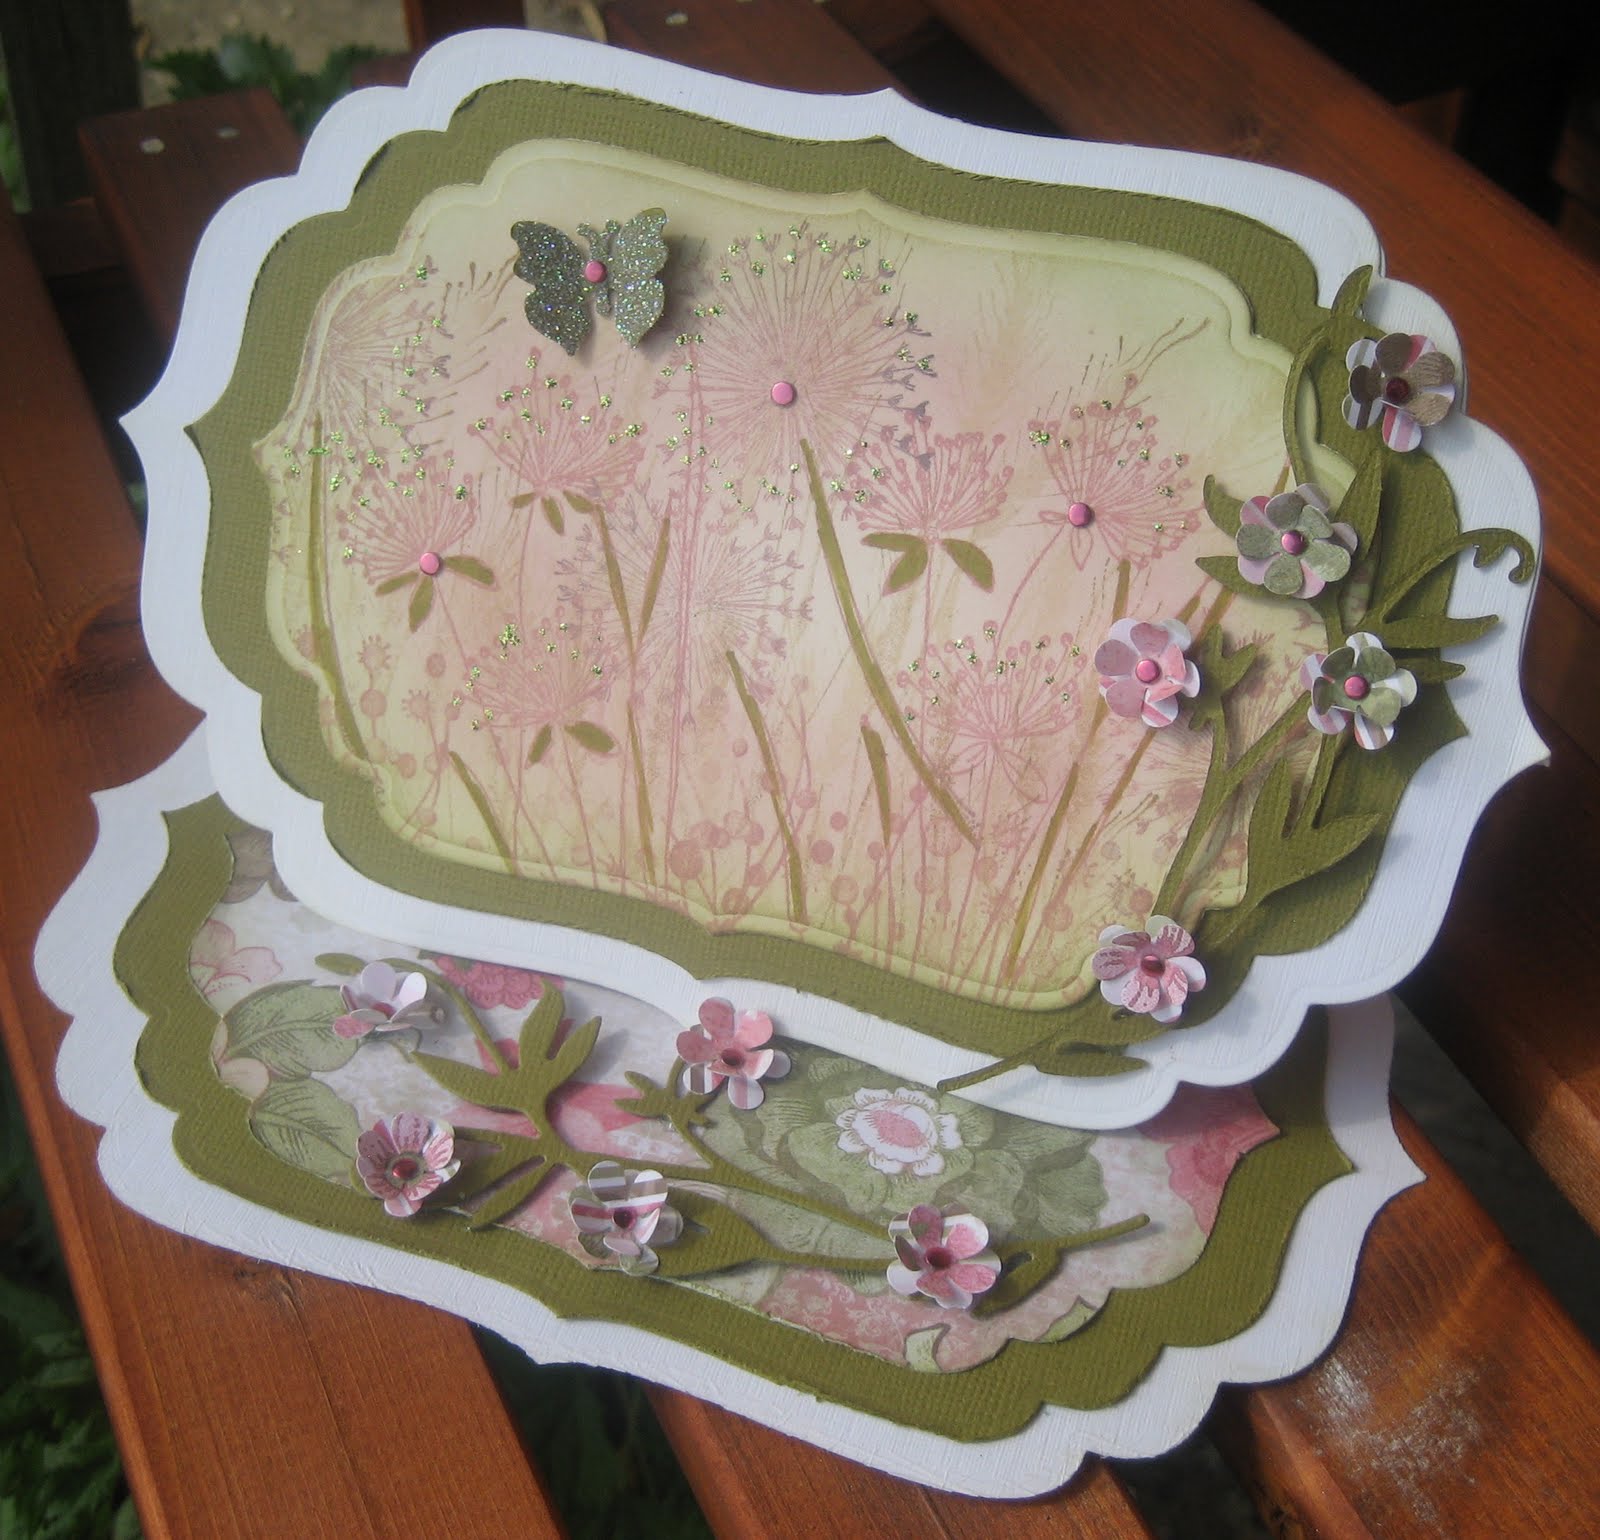
Q) What cardstock is it best to use ?

A) Although they will work to some degree on most surfaces, those with a little texture are preferable in my experience. To give an idea the top card was done on to the reverse side of Centura Pearl which has enough texture to grab the Pans nicely and the bottom card is Lavinia mat card stock and because it has a much smoother surface you get a softer feel from the Pans. Watercolour card also works very nicely and I think the only card stock I found which doesn't is very smooth stock such as Clarity card because there is no surface to hold them.

Q) Do they work for resist techniques ?

A) Absolutely beautifully and this is where smooth card stock is the exception to the rule above as the ink provides a surface to grab the Pans. When I do resist technique I still give the finished piece a wipe over with a piece of kitchen towel.

Q) Aren't they just like chalks ?

A) This is probably the most common question I been asked and the answer is most certainly not, although I'll admit before I tried them I was guilty of thinking the same. They are highly pigmented, very hard and extremely smooth and that is why they blend so seamlessly.

Q) If I add to much and the colour is too dark have I ruined my piece of artwork ?

A) Absolutely not and this is again where they differ from any other medium because you can just rub it out  with a regular rubber and start again and there are no tell-tale marks left from the error.

Q) Can they be applied with make up sponges ?

A) I thought so initially, but have since invested in the proper Sofft sponges and although they are not cheap allow you to achieve the seamless blending effortlessly. 

Q) How long will they last ?

A) An awfully long while, I have used mine repeatedly over several months now and there is not even a visible dent in the surface. An inkpad given that volume of use would be fading by now.

Q) What process do you follow to create your cards ?

A) I stamp the main elements of my card or scene with archival ink, much the same as when brayering and then add the pans.

Q) Is it an easier technique than brayering ?

A) In my view most definitely as there is less chance of error and as explained above they can be erased. I still follow the same technique creating hills, clouds and shading using the torn paper technique but you have far more control adding Pans than with a brayer.

I'm sure I haven't covered everything by any means, I have just tried to think of the questions I get asked most often so if there is anything specific you want to know please just drop me a mail and I'll be happy to try and help.


Sunday, 22 July 2012

Quintessentially English Garden Party


It's my week to showcase another card for this months Garden theme at Craft A Scene.

The news on my word recognition programme remains positive and I am slowly catching up with everyone. There are a few foibles I still need to sort out on the pronunciation, but I thinks that's more down to me that than the programme. But from what I have seen thus far I would certainly recommend it to anyone with dexterity and similar problems.

My thinking behind this card..............bearing in mind I do live in a bit of a fantasy world, is three elegantly dressed ladies attending a quintessentially English Garden Party. It is also the card I have made for our eldest daughters birthday in a couple of days...............I'm safe, she doesn't blog.

I used some masking to create the sun..............you all know there has to be one or a moon................and dusted Adirondack inks to create the sky and hills, then stamped the ladies in black archival ink, the flowers using TH distress markers direct to stamp and the blossom which I coloured with Copics and decoupaged.

If you have not already joined in the challenge there is still plenty of time so I really hope so see you there.


Tuesday, 26 June 2012

Butterflies and birds


Morning Peeps, dare I say it looks just a tad like summer out there this morning, well at least it's not raining and there is a distinct hint of sun behind the clouds.

Not too much to share that's new, so a few samples I made before our vacation as I am busily beavering away with samples for next Monday's Stamp Addicts Create and Craft TV shows...................Monday 2nd July at 2pm and 7pm and I can tell you we are in early Christmas mode and will share some later this week.


Meanwhile some brayering and inky indulgence with some wings thrown in for good measure, samples for Sir Stampalot, basically different colour takes on similar themes I've done before. I'm still totally smitten with the TH birdcage and Papillion stamp set.................does it show just a little ? And now I have the bird on branch as well, you will get a look at what I've done with that on Sunday when Penny Black, Stampalot and Craft a Scene go live with our July challenges.

Lots of distressing on the top one, Frantage embossing powder and distress inks and on the fairy one, a masked moon and sponged sun rays and hills and the lovely Go Create arch die. List of ingredients below.

Have a lovely day everyone and as always thanks so much for popping by, I am always really appreciative of your visits.


Monday, 18 June 2012

Puppies and horses just don't mix..............


Morning (edited Monday evening to say it was when I started this post !) everyone, it seems like it's going to be one of those weeks, poor little Poppy was settling in so well until she decided horses looked like a good option for playtime. On a routine 'loo' trip Sunday morning she took off like grease lightening, across the garden through the electric fence, across one paddock, past placid Ben who just watched her and into Heskeys paddock.

Bad move, he's got some Arab in him and dances like a prima ballerina as a normality and as at least two cockerels have discovered to their peril, he hates anything round his feet. One massive yelp and we really feared the worse, but she is one lucky pup. Sunday afternoon was spent at the vets and again yesterday for more checks and they confirmed nothing broken just cuts and bruises, something of a miracle when you consider her size against Heskey. So lots of cuddles as she is feeling pretty sorry for herself, but things could have been far, far worse.

Needless to say no crafting happening here, so my share is one I made a few weeks ago with some basic inking and masking, Art Impression and Lavinia stamps and Adirondack Ink. We have so many rabbits jumping about in the fields the last few weeks which inspired this card.........artistic licence with the sun as that's still is short supply here in the UK.

I would like to enter this into the following challenges:

Pans Pastels - Summertime
Simon Say's - A bit of brown

Thanks for popping in, I am doing my best to get round all my blog buddies, but it's taking time with the poorly furry bundle to look after.

Wednesday, 25 April 2012

Down the bottom of the garden


I won't say anything more than Morning to you all, as the weather is so atrocious the the word good is far from applicable. Will Spring ever return I wonder ? It's rained solidly for two days now, but will it be the right sort I wonder, as I am told not all is, whatever that can mean.

A really quick share as it's busy at work this morning, so fitting this in with my coffee. Another card using my current favourite fairy stamp Harietta, stamped through an oval mask and shaded with ink dusters. All the ingredients can be found in the thumbnails below.

I am entering this into this months Create a Scene challenge which is 'Silhouettes', it's my second entry and I thought I would stick with the fairy theme.

Hope you all have a good day.


Saturday, 3 March 2012

Spread your Wings


Sending a wholehearted thank you for all the wonderful messages of support I received this week can be the only way to start this post................I received literally hundreds of e.mails when my blog comments had to be disabled.........thank you seems inadequate for the warmth and kindness so many have shown towards me during a difficult week.

Now back to business and it's yours truly's turn to host the challenge at Allsorts this week and my theme is 'Spread your Wings'.........use anything with wings as your focal image.

In fact I've a little confession to make, I had intended using a butterfly for my DT piece, but when I saw this new stamp Harietta on the Lavinia stand at Stamperama a few weeks ago it was love at first sight and I had to have her as well as the smaller silhouette version.

To create the sky I used a plate to tear some copy paper to create a rainbow shape, then used that as my mask to ink round using Adirondack butterscotch, watermelon and red pepper, along with citrus for the hills. I stamped Harietta with versafine black, heat embossed with detail clear and coloured her with Copics and glittered her wings and skirt. The trailing flowers and toadstools are also from Lavinia. The swirl is a TH die and the rose made from a five petal punch.

Have a wonderful weekend everyone, they threatened more of the white stuff so it might be a perfect excuse to stay in, keep warm and craft, sound good to me.

Sunday, 1 May 2011

Floral and Fantasy


Seems I just can't help myself when it comes to choosing themes, at Stampalot Challenge this month we would like to see 'Magical Worlds' and at Penny Black at Allsorts 'Shape Up' anything but square or rectangle.......I know I didn't have to go floral with that one, but somehow that's what I ended up with, so no surprises really.

My Stampalot fairy scene started by using a mask to create an oval then some brayering using the good old Speedball and Adirondack dye inks and stamping with a mixture of Artstamps (castle) Personal Impressions (large fairy and toadstools) and tiny Lavinia fairies.


I used Grand nesties one to create the actual card for my Penny Black make, distressed a piece of Fabrianao watercolour card with TH spun sugar and peeled paint to match the pretty Kaiser DP, then stamped randomly with a number of different Penny Black stamps. The swirls were cut with a Marianne die and punched flowers dotted about, a butterfly and some stickles and glitter.

Monday, 24 January 2011

Messing about with the brayer


Monday morning already, where did the weekend go ?

Well, I guess I should admit to a fair bit of playing about with inks and the brayer. I have been promising myself an inky session for ages and as I went to Coleman's who I do the odd demo for on Saturday to get some new colours of Adirondack inks, it seemed only right I tried out a few of them. Don't know how many of you know about Coleman's warehouse at Rushden, but it's pretty awesome and you can while away hours there. Yesterday looks like a blue and yellow day although it was not planned that way, just how it turned out, so my next session will be a bit more colourful.

Most of the stamps are either Lavinia, Art Impression or Clarity, except the fairy which is a really old Rubber Stampede one. I so enjoy brayering and find it very rewarding and it's always a popular one when I demo. I did think about doing a tutorial, but then decided it might not be fair to bore peeps. So the above card is for:

Crafty Catz - A forgotten stamp
One Stitch at a Time - As you like it
Pear Tree Design - Mainly blue

The card above is using one of the new stamps Hero Arts K5503 Bird Collage, stamped simply with versafine sepia and embossed with detail clear. The October Afternoon DP is double sided and I stamped Hero CG222 Music Background on the lighter side to add interest. Edges have been nicely distressed as is the flower made from TH tattered floral die. This is for:

Paper Sundaes - Distressing
Alys Sundays - For the guys
Gingerloft - Things that fly

Wednesday, 19 January 2011

Fairy castles


Hello peeps, winter has returned and a really hard frost this morning, I guess that's the penalty we pay for the sunshine, but I would rather have that than the rainy dull weather of last week.

I managed to have a really good play last evening minus the sling impediment....although my arm is complaining a bit now and the osteopathy visit left me a bit sore this morning, but it is definite progress.

Some inky shares but first I need to say a big thank you to Isa in Spain for passing on this award to me, it was so kind of her. You all know my rotten track record with passing on awards as I never can choose, so this is for all of my lovely blogland friends, please lift off to your own blogs with my love.


Now for my makes, the first one up top of this post involved making a simple mask with an oval aperture and sponging TH marigold, stormy sky and peeled paint. With the mask still in place, I stamped the castle F40047M by Stampalot and a mixture of Lavinia stamps to create the little scene. Then simple matting onto coordinating cardstock and a border punched with MS Vintage lace and of course a liberal helping of glitter to finish. This card is for the following challenges:

ABC Challenge - M is for magical
Flutterby Wednesdays - Anything goes


My second card using the good old speedball brayer was inspired by the beautiful evening sky here in the Fens yesterday..............a bit of artistic licence thrown in as we don't have hills, just flat landscapes for miles as far as the eye can see.............absolutely beautiful mind you, but an aquired taste and alien to those who come from more undulating parts of the Country.

It was a really magical sight with beautiful oranges topped by dark cloud and the setting sun was almost colourless against the vivid sky. I used Adirondack eggplant, butterscotch and meadow for the brayering and the stamps are Hero Arts S5316 Silhouette Grass and Art Impression G1045 Geese both stamped with Adirondack Espresso. This card is for the following challenges:

Bee Crafty - Ray of sunshine
My final share is yet more fantasy, this time Sweet Pea Fairy of the Night. available in the UK from Crafts and Me (link on sidebar). A moon of course........sorry for the monotony but all good fairies deserve a moon or sun.......... masked and brayered with Adirondack cranberry. The image is heat embossed with detail clear then coloured with Copics and some paper piecing for her dress and crystal ball. Lace, flowers, beaded pins, a border punched with MS garden trellis and the easel card was cut on the Cricut. The My Minds Eye DP is a really old one, all lovely and glittery. This is for the following challenges:

Simon Says - Bingo (lace, flowers and embossing)
Crafts and Me - Monochrome
Creative Cottage - Shaped card
Papertake - Ribbons and pearls

Saturday, 11 September 2010

Magenta 2010 new releases and challenges


Good Morning everyone, firstly thanks to all of you for your kind messages about my health and entering my candy at the top of my blog.

I have been very good this week, followed doctors orders, had lots of rest and this is my first posting for days. But beings it it, I need to make the most of it and it's a bit of a long one so you might want to grab a coffee, a bar of Cadburys or even better both !

I have been doing a bit of crafty dabbling, just the odd hour indulging in some of the new Magenta stamp releases which landed on my doormat from Sir Stampalot this week. They have the stamps on line and ready to buy and there are some gorgeous ones, a mix of Christmas and others, so do take a look and there a few samples below.

As it's Saturday it's time for a new challenge at Allsorts and this week it's yours truly's turn to set the theme and I am going very seasonal with the theme "Colours of Autumn". And as I love working with the rich Autumnal colours, two DT cards from me this week.

For the first card above I have used one of the new stamps from Penny Black 40-037 autumnal gifts, I have probably said this before, but this stamp totally sums up this time of year to me and the Harvest Festival celebrations that will be happening in Churches everywhere. And perfect for a man as well, my Dad who was a farmer would have adored this image, so this is for you Dad.

I stamped the image onto ivory linen cardstock using versfine sepia and embossed with detail clear before colouring in with Copics. I used the top element of the stamp to add corn to the corner's of the card. I have no idea of the name of this shape of card, but it is so easy to make using just a scoreboard and Nesties and quite effective I think. Finally, I punched some leaves with the lovely new Xcut punches which also emboss the leaves so you can highlight with inks, I used a selection of brilliance. This card is also for the following challenge:


My second card used the clever stamp set from Lavinina where you stamp first with the solid leaf shape then overstamped with the skeleton. I used Tim Holtx frayed burlap and rusty hinge. I then covered the leaves with Diamond Glaze, allowed to dry, then inked the whole piece, which is cut from Nesties, using TH sage, wild honey and barn door. I then overstamped the whole piece with Hero Arts H2365 old French writing, rubbing up the leaves afterwards to remove any ink. The leave have a lovey raised sheen, but it difficult to pick this up on a picture. Finally I tied some cord and added buttons and mounted onto a piece of Kaiser DP. This card is also for the following challenges:

Fab and Funky - Whatever
Raise the Bar - Orange, brown, green
Paper Play - Autumn is a coming

Next my card for this weeks challenge over at Polkadoodles where the boss Nikky is in charge again and has given us a sketch with a recipe and hidden twist.

I turned the sketch sideways and created a flap at the side with a greeting beneath using a Fairy Flutterby stamp. The paper is all from Paper Boutique and the flower made from the same papers using the Tim Holtz tattered floral die.

Now a couple of cards using the new Magenta stamps I mentioned above. The first one is a Christmas stamp Magenta 43032L Seasons Greeting which I think has a real Victoriana feel to it. A bit unusual having a rose on a Christmas Card, but perhaps it's a Christmas rose ! I stamped it with stayzon sepia and coloured with Aquamarkers. I stamped Hero Arts CO222 Music Background on the actual card using Tim Holtz frayed burlap. The DP is from stash and punched with Martha Stewart cornice border.......a little indulgence I could not resist, it's so elegant and I think goes with the theme of the image wonderfully. This card is for the following challenge:

Simon Says - Holiday Fun

My final card is using Megenta 95276N Field of Poppies.....I have always loved poppies so this was was a must have. I created a background with TH distress inks and water, then stamped the image with versafine black and embossed with detail clear. I added extra colour to some of the poppies with Copics then covered them with Diamond Glaze. The DP is Daisy bucket, I used the same MS punch as he card above and made a flower with my Tattered Flowal die.