Tuesday, 29 December 2009

Just a card

Hello everyone, though I would try a bit of crafting this morning, have to say not really back into the swing of things, minds still fuzzy from all the hectic Christmas activities and the body's less than willing. The need for a holiday seems to be high on the daydream agenda, although the reality is it's not a likely option......... but I can dream of warmer climes. My ideal year would be November to February somewhere nice and warm like Egypt or Florida, oh if only.

So back to reality and a card using one of the stamps I chose as part of my Simon Says win at the Penny Black blog hop a few eeks ago. It's Inkadinkado 93075X which I stamped with versafine black and embossed with iridescent embossing powder then colourd with a wash of Twinkling H20's.

I stamped swirls down one side with Inkadinkado 97632 and Hero Soft Peach, then laid over a swirl cut from a Sizzix border die on my Big Shot Express.........Santa delivered this on Christmas day.........a conspiracy between my hubby and the Stampalot guys.......and it is a dream to use, just hold the button and it cuts, not cranking or turning, just wonderful and easy.

To finish butterflies and three roses made from matching paper, some punched laves and a border using Fiskars Threading Water punch.

Sunday, 27 December 2009

Rosie D's challenge 61

I do hope everyone has had a magical Christmas and is enjoying the holiday period. At Rosie D's we decided that some of you might be longing for the opportunity to try out the new goodies Father Christmas delivered, so rather than delay a new challenge until the New Year, we have a new one for you today. As usual it will run for two weeks.

And we have a fabulous sponsor - Digi Sparkle. The DT have been given Digi Sparkle images to create their DT project and Heather who owns the company is very generously offering the winner "Free access to their shop for a month" - Wow! What a prize!

As you can see, I have made an easel card using this great punk image and have coloured him with Copics and mouted him onto mats cut with Nesties through the Bug. I resized the guitar, copied it several times and created a border band. The DP is My Minds Eye and the letters cut on Cricut Jasmine. Note the nose ring which took longer to fix than the whole card ! Not my normal style of card, but really enjoyed this one.

Wednesday, 23 December 2009

Happy Christmas one and all

Wishing all my wonderful blogland friends a Joyous Christmas and a Peaceful and Happy New Year.

Well the shopping's done, M&S was a nightmare but my friend Mark Spencer does give me so much assistance with my catering and well worth the queues. I have twelve for dinner tomorrow evening, the same Christmas Day mostly all sleepovers and lucky me only eleven Boxing Day.

Now need to do some serious preparation but still waiting on the rest of the game for tomorrows game in red wine..........got the venison, but I think the birds still have pulses because they were due in my kitchen this morning and not arrived yet.......sorry all you veggies out there.

My youngest granddaughter has been keeping occupied today making place name tags for the Christmas table, lots of glitter so we all know who she takes after.

Now for what will probably be my last post for a day or so, although I might make an escape to my craft room for a bit of peace and quiet when everyone is sleeping off Christmas dinner.

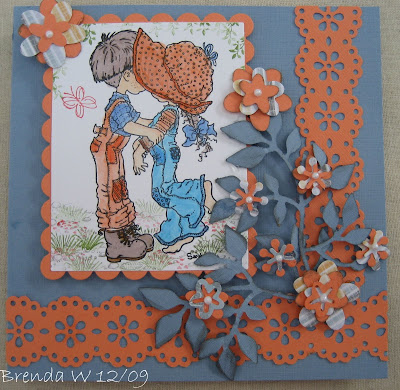
This week ABC challenge is "K for Kissing". I think this stamp might be making quite a few appearances but it's a new one to me and I've been itching to colour it up. Tomorrow also sees the start of ABC's new sister challenge ABC Christmas which they are launching with a blog hop. This one seems like a fab idea and will definitely be joining in and who knows, next year I might be half ready when Christmas arrives.

My image is Sarah Kay First Kiss, which I coloured with copies and cut the mats with nesties through the Bug. I added some grass, leaves and cobbles using Art Impression stamps. The yummy border is one of my new goodies from Sir Stampalot - its Martha Stewart Double Lace Doily, isn't is gorgeous. Leaves and flowers were also cut through the Bug using Sizzix dies and pearls added.

Tuesday, 22 December 2009

Just for my Dad


Good evening everyone. I was not going to do a post today for reasons your will understand in a moment, but when I picked up some more new goodies from Sir Stampalot today one stamp in particular told me I should make a card today for a very special person.

Later in this post I will also share some if the things that were tumbling out of boxes from today's deliveries.

It is a year ago today that my dear Dad died, I am an only child and cared for him for the last three years of his life after my Mother decided their marriage was at an end and Dad was too poorly to look after. He was the most caring person you could wish to meet, asked for so little yet gave so much and I still miss him every single day. His life was his family, farming, animals and his garden where he produced enough vegetables and flowers especially roses and chrysanthemums to provide for the whole village.

This stamp is one of the new Hero Arts releases S5316 Silhouette Grass and to me epitomises the Country hedgerows and fields around the farm where Dad used to take me for walks with the dogs and my pony when I was a child.

The grasses were stamped with versamak and embossed with detail copper and I shadow stamped with Hero soft sand, onto a background piece stamped with Hero F5042 Leaf Flourish and H2365 French Scrip, embossed with detail clear and distressed with Tim Holt Spiced Marmalade.

As Dad grew such wonderful roses he would approve of the three I have made for this card. The swirls are cut from a new Sixxiz "Swirly" die that arrived at Stampalot today along with the TH Adage Tickets which fit the sentiment of my card perfectly.

Now new goodies, lots of Hero Stamps, new Martha Stewart punches and Nesties and to store them all just look at this:

Appalling pictures I know, but the combination of no daylight and shine from the Nesties, this is as good as I could get, but you can get the idea. These magnetic sheets are brilliant, there are three in a pack and hold your nesties all in one place. Up till now mine were in envelopes, but this is so much better and easier to see what you have got.

And a few of my new stamps and one of the new MS double border punches which are just gorgeous, as are the new round the page ones which create a fabulous mat, punched all round, corners as well to fit a 6x6 square card. I have lots of creating to do with these new goodies and will be sharing very soon.

Monday, 21 December 2009

Cupcake chellenge in the ultimate comfort zone

Monday morning and only four more sleeps until the big day and still not really ready. Are we ever ready, I very much doubt it, although I stood behind a lady in Tesco the other day who was extremely confident she had been ready since the first of December.......she went on to tell the cashier that she makes it a household policy that everyone has their preparations completed by that date........I felt like saying wake up to the real world lady ! The cashier gave me a wry look as she walked away and I had a fair idea that his thoughts were not too distant from my own.

Crafting - well my mojo has been on holiday the last few days........or could be away making Christmas preparations with the lady in Tesco........but thanks to Claire and her wonderful artwork it has made a brief appearance today, albeit it very much in my botanical comfort zone. Claire has come up with another brilliant image and it's free to anyone who pops along to her blog.

As soon as I saw her latest image I could visualise a card and I have used it for this weeks Cupcake challenge which has the theme "Time For Celebration - a fairly open ended theme birthday, new baby, wedding, engagement, the choice is yours!"

So I have used Claire's image which I thought matched wonderfully the dragonfly she created form me a while back when I won her candy. I printed the main image three times and dragonfly twice so I could decoupage, colouring with Copics. I have added diamond glaze to the tulips and mounted all onto some My Minds Eye DP, a greeting from Rubber Tapestry CLS5006 made into a ribbon slide using a Nestie run through the Bug and some ribbon. I also traced the swirls on the image bow and added crystal glitter. As I said, very much comfort zone stuff.

Saturday, 19 December 2009

Allsorts challenge 31

Wow wow you guys, did you come up with some wonderful projects for my theme last week at Allsorts. You are such a talented lot so thanks to one and all.

This week Debs is hosting the theme which is "Anything but a card", another one to get those creative juices flowing.

I am sharing a tag book I made in response to a request for a Birthday card for a secretary named DEB who has a fetish for Post It Notes. Inside the book I have made a little pocket that holds a pack of them. I cut the pages from a 300gsm cardstock on Cricut Plantin Schoolbook and Jasmin welding the elements together on the DS. I cut a replica of each page from Basic Grey DP's and stuck them together before punching the ends and inserting the wire binding using my Zutter.

More roses.......sorry if they are becoming monotonous, some punched leaves pearls and ribbons to decorate.

Friday, 18 December 2009

Polkadoodles DT project challenge 51

Before I go on to this weeks Polkadoodles challenge, I want to say a huge, huge thank you to everyone for their wonderful support. I confess I was a bit thrown by the events of the past day or so, but with your help I have been able to rise above that negative activity and blogging will re-commence as will roses and other crafty activities.
Now on to Polkadoodles where the theme is an open one. The DT have come up with some awesome projects using the new Back to Nature CD, do pop along and check out their inspirational work. When I saw these flowers on the BTN CD I fell in love with the colours and knew exactly what I wanted to do with them........you know, one of those rare cards where it just clicks into place.

I re-sized the flowers, cut them out and decoupaged. The stalks are stamped with Brilliance Thyme using one of the swirl stamps from the Daisy Doodle Stamp set and added leaves cut from the petals of one of the flowers. The sentiment is also from the stamp set and the picket fence a new Martha Stewart punch I just had to have. I chalked clouds in the background and added punched vellum butterflies and gems here and there.

Thursday, 17 December 2009

Putting the record straight

I have always enjoyed my activities in blogland and been the first to say what a friendly place it was. I was therefore mortified to receive a mail from a blogger which has prompted me to do this post.

This is what they wrote, I will not name them, but they know who they are:

"Brenda

I have seen your rose tutorial and it is sad that you have copied the wonderful Tim Holtz and claimed his work as your own
http://timholtz.typepad.com/my_weblog/2009/12/12-tags-of-christmasday-12.html If you wanted to write it why didn't you say it was his work.

Lots of people have followed your tutorial and credited you with the idea which its not at all. I have always followed your blog and thought your work was original but now I wonder. I will not be following your blog any more."

Until last evening I was unaware of a few comments buzzing round blogland, but prompted by the mail and those comments I thought I should put the record straight. Apparently TH has also posted a rose tutorial, which I have just been directed towards and it seems mine and his versions are pretty much the same with the exception of a bit more distressing on his part, as we would expect.

My tutorial was posted on 8th December, Tim's on 12th December, presumably those making the comments and the person who mailed me failed to notice this. And I can confirm my crystal ball is not that reliable.

I have been making my version of paper roses for some months and demonstrated them at Sir Stampalot and Coleman's on at least three occasions in recent months, but as with all things crafty, everybody's version is different and there are no patents.

I am being totally honest when I say that I had absolutely no idea TH had a rose tutorial until it was pointed out to me on my blog. Had I done so and copied it as is suggested on several posts in blogland over the last couple of days, then I would have been happy to credit it to him. But given my tutorial was posted four days before his, this would have not been possible. Moreover I could have saved myself hours of making roses, taking pictures and writing up the tutorial, something I had been promising for a couple of weeks but delayed due to an eye op.

The whole reason I did my tutorial was to help others who had asked how I made them.........to me this is what crafting is all about........sharing ideas and passing on new found techinques.........as I repeatedly say, we all draw inspiration from each other and crafting is a continual learning curve.

Tuesday, 15 December 2009

Challenges and showjumping

Good Morning everyone, hope you are all having a good Tuesday. I has a sudden frightening thought this morning and panic set in, Christmas is next week and I still have oodles of pressies to wrap apart from thinking about shopping for food, but sure I'm not alone here. It always seems to be forever coming then suddenly arrives and I never seem to be ready.

First I want so say a big thank you to the team at ABC Challenge for selecting this card for their Top 5.
Next an update of yesterdays equestrian activities as several of you have kindly asked to hear more. Anysia did really well and we were so proud of her. She scored two 8's and two 9's in the dressage, she had three down in the showjumping, but that was par for the course with all the riders. Fences were set at 3' plus for her group and there were a good number of refusals, at least Ben attempted them all........well apart from the Joker which he obviously didn't like the look of as he ploughed straight through it.......he's a hefty lad so took it all in his stride - literally. Overall scores were being calculated last night and will be announced at College today, Cambridge Milton Campus where she is doing Equine Studies. I will update when we know.

On to my card which follows a great sketch at Everybody Art Challenges and also covers Cupcake challenge theme of "5x5 Birthday" and Creative Card Crew where "Anything Goes".

I firstly stamped around the edges of a piece of cardstock with Hero Arts F5042 Leaf Flourish using versamark and detail clear embossing, then distressed with Tim Holt scattered straw and fired brick. My main image is Lady and Dog from Unmounted Stamp Company which I coloured in with Copics and added some gold leaf and gems. The sentiment is Rachelle Anne Miller Sentiments RM063. DP is Magnolia and the roses made from cream copier paper (tutorial here).

Monday, 14 December 2009

Penny Black and Friday Sketchers

Hello peeps, scheduling this one, so it should Monday when you read it and hoping you all had a good weekend. Mine was real fun but hectic to say the least, sixteen for lunch and dinner Saturday, then eight sleepovers just making their way home, so not much blogging or crafting. Work in the morning, then in the afternoon off to watch Anysia taking part in a chariy "Strictly come Show Jumping" - she's dressing as a very pink fairy, tutu and all over her joddies and Ben nicely braided in matching hot pink. Just hope there's not a horsey language where the others can tell him what a woos he looks.

Crafting........well this is it from my weekends activities, a card following this weeks Friday Sletchers and Penny Black who want to see 'Red and Gold'. An easel card as I am rather getting to like these and still have one or two crimbo cards to make. My main image is Penny Black 3768K Christmas Montage, stamped with versafine and embossed with a mixture of red and gold powder. The DP is K and Co, the border punched with Martha Stewart Apline and the gold swirl and poinsettias cut with Sizzix dies through the bug with gold gems added to the centres.

Sunday, 13 December 2009

Rosie D's challenge 60

This one is just for all of you who still have those last minute Christmas cards to make........that probably means all of us if I am anything to go by. It's Rosie D's new challenge with the theme "Rudolph has a bright new bell" - interpret it as you will, I can see some great fun projects coming our way.

I have made a card using a real old favourite from Stampedous 4611 - Rudolph which really is simplicity itself to make up a quick card. Stamped with versafine black, embossed with detail clear, oodles of glamour dust and stickles for his bells and nose. Some ribbon down the side and a 'bright new bell' dangling from it. The sentiment is Art Impression H2775

Saturday, 12 December 2009

Allsorts Challenge 31

It's Allsorts time again and this week it is my turn to host the challenge and I would like to see pearls and swirls on your projects which can be just about anything from a card to a cake. The choice is yours and I will be round to see all your entries during the week.

Our sponsors this week are my mates from Sir Stampalot who have provided a fabulous prize for this weeks winner that fits perfectly with my theme........no coincidence really, I did let them in on the theme a week or so back. Thank you Andy and Janice for your continued support.
I have made a box and matching card. The box is made up of four large match boxes covered with K & Co DP, mounted onto a based of mount board and a top of the same which I toned down with Tim Holtz Peeled Paint, then added layers of gold mirri and red card and a top layer which I distressed with the same TH ink. I repeat stamped over the whole piece with Hero Arts H2365 French Scrip and the same TH ink, then repeat stamped round the edges with Hero Arts F5042 Leaf Flourish using Versamark and detail gold embossing powder and again the TH peeled paint. The centre greeting embossed in detail gold is Art Impression J1674.
As I am still in my rose mode I decorated with a mixture of large and small roses made from the same K & Co DP (tutorial here) and added punched leaves and some curly JudiKins ribbon. The card was created in exactly the same way and is basically a replica of the top of the box.

Friday, 11 December 2009

Polkadoodles challenge

What a learning curve I have been on this week with my first DT card for Polkadoodles. My goodies arrived lunchtime Wednesday but as DT work is due in that day not too much time to get my head round everything.......now the confession, I am a total virgin at working with CD's. But, how easy the Back to Nature CD is and wow, what fantastic images, all very my sort of thing and now I can't want to get stuck in properly to this one one and the others.
The theme for this weeks challenge is New Year with an envelope somewhere on your project. I just love this owl family and the polka dot paper and being eager to try out everything have used one of the flower swirls from the accompanying Back to Nature Unmounted Stamp Sheet and stamped across the top of the card and embossed with iridescent powder for some New Year sparkle. The punch is Martha Stewart Embossed Scallop, I added Diamond Glaze to the owls eyes and some pearls to embellish.

Tuesday, 8 December 2009

Rose tutorial - at last

OK Guys, the rose tutorial at long last. Had the pictures done for ages, just been waiting for this eye to allow me to spend long enough on the computer to put it all together. But after showing so many lovely crafters how to make them at the weekend demo and now there are so many subtle hints popping up around blogland that me thinks I'd better get my act together, so here we go.................
The basic ingredients:

Six petal punch (1" used here)
Dries clear Art Institute glue
Iridescent embossing powder
Versamark inkpad
Tweezers (an absolute must unless you have endless patience)
Patterned or plain paper (see notes at bottom)Punch out three flowers for each rose. Brush versafine or other ink pad around the edges, dip into embossing powder and heat. Then crease each flower across the natural line between the petals so you can see six sections.
Following the crease lines, cut to the centre of one flower. Do the same on the second flower but cut one section out. Repeat on the third flower but cut out two sections (as one). You will then have five elements to make your rose.
Using the dries clear glue take the largest flower and overlap one petal onto the next at the cut section. Do the same with the next two graduating down in size, so you are left with five elements of 5,4,3,2,&1 petals.
When dry (allow a couple of minutes), using a pokey tool or cocktail stick curl each petal outwards. The single petal should be rolled into a funnel shape.

Cut the tips off the bottom of each section - don't worry about the hole in the bottom, this will be covered as you assemble your rose.

Using the same glue put a couple of 'blobs' onto the bottom of the four and three petaled sections, place the four petal onto into the largest, then the three petal section into the other two working down in size.
Next put some glue into the centre (the centre will now be the three petaled section) and arrange the two petal piece and finally the single petal - the roses are quite resilient, especially if you have embossed the edges so and you can push the pieces round until you are happy with the placements.
A few notes:
Double sided paper is best otherwise you will see a white middle petal - but you can always colour the reverse of the single centre section with an inkpad or other colour medium. I have tried all sorts of DP and find Daisy Bucket one of the very best as it is beautifully pliable, some DP can be stiff and will fold rather that curl. Good old copier paper also works very well.
The above rose is made from plain orange copier paper and heavily ebbossed with iridescent glitter. When making three roses, which I find the optimun number for a project, I like to make a couple from one side of the DP and one from the other to add contrast to the finished project.

You can also create your own pattered paper to match your card by stamping and embossing the cut out flowers before assembling into your rose. Vellum also works very well and can be stamped to add interest. Embossing the edges with clear embossing powder works wonderfully on dark colours and looks like dewdrops.
I made the roses above from plain cream copier paper, brushed beige and green brilliance inkpads round the edges and embossed with detail clear powder.

The roses below were made from a patterned DP, the edges embossed with crystal embossing powder and stamens added - mine are from a garden centre which sells florist and cake decorating accessories. Equally you could use gems or brads, placing them inside with silicone.
I hope this all makes sense and you can follow everything, but any questions please don't be afraid to mail me (link on my profile). Happy rose making and I'm expecting roses to be blooming all over blogland very soon.

Exciting news and a challenge

Sooooo excited.......I have been asked to join the lovely bunch of girls at Polkadoodles. Needless to say it only took a moment or two to reply and say thank you so much for inviting me to join your DT which covers working on projects for both the Polkadoodles challenge blog and the TV programmes promoting the CD's created by the very talented Nikky.

This one is all very new to me and I need to do some homework, just miffed I missed their latest C&C programme on Friday so I am eagerly awaiting the repeat to pop up. But I have read lots of great comments about their CD's so can't wait to get my hands on what I will be working with.

Now a challenge and in advance I'll say the picture is rubbish, but as it looks like raining all day will have to go with the best of the bunch. My card is for this weeks Cupcake challenge where they have the very seasonal theme "Sing a Christmas Carol". The trees give mine away a bit "Oh Christmas Tree" and also fits perfectly into Tuesday Taggers who have that very title as their theme this week.

Another easel card, thought I would do another one as I rather like the first one and think the shape makes a nice change. The three three are cut from JudiKins 2996H stamped simply in black versafine and mounted onto pink and silver mirri card and embellished with gems and cord. The greeting is Penny Black3995F. The snowflake edged mat has been created using Martha Stewart Alpine Punch Around the Page. Sir Stampalot asked me to play with this on Saturday and I really like the system which is so easy to use and creates a lovely mat for adding stamped images, decoupage or whatever you are into. They had a huge delivery of these sets and I have already bought 'scallop 3 dot' set, so watch this space. Finally I added some silver and pink ribbon, some punched holly leaves and the song title was computer generated. I shoud probably add that the snowflakes dotted about are the cut-outs from the border, not part of the pattern created by the punch.

Sunday, 6 December 2009

Thank you and challenges

Oh wow, where do I start, yesterday was a fabulous day at Sir Stampalot and I can't begin to express how thrilled I was to meet so many of my lovely blog buddies and to be able to put faces to names. And of course not forgetting all of those I already knew who also popped in to say hello. At the risk of offending anyone by missing their names I am just going to say a huge thank you one and all for taking the time to come, many travelling quite a distance from places such as Nottingham, Norfolk, Yorkshire and Hampshire.

I would love to have been able to spend more time chatting and talking crafty with everyone, but unfortunately the popularity of the day just did'nt allow as we were kept on your toes from start to finish. And if the queues in the shop were anything to go by there is are an awful lot of new crafty goodies being played with today.

I have one card to share with you today which is for this weeks Penny Black challenge which has the theme Christmas for the Girls and Stamping for the Weekend which wants to see Red, Green and Gold. I don't really have a 'girly' PB stamp so have gone for he more sophisticated female approach and made an easel card .......these seem to be popping up all over blogland so thought it was time I made one.

My image is Penny Black 3768K Christmas Montage, stamped with Brilliance Red, Thyme and Gold, distressed round the edges and covered with two coats of UTEE. Another of my roses that were very popular yesterday (using a 2" punch for those of you that saw a demo) and surrounded by punched leaves and pearls. The bottom border was punched with Martha Stewart embossed scallop, the greeting is my favourite Christmas sentiment this year Penny Black 3995F Ornamental Script and DP is K & Co.

Friday, 4 December 2009

Sir Stampalot Big Demo Day


Demo Day Samples
Time to share a bit more of my work for Saturday I think.......yes you got it Sir Stampalots Big Demo Day. Have those guys Andy and Janice been working hard pulling it all together and it promises to be a real fun day for everyone, of course with some serious crafting thrown in.

I am easing back into my crafting but still can't spend too long on the computer as the glare is a nightmare, but thankfully I had prepared most of these creations before my eye went on annual leave.


As you can see, there is a bit of a candle thing going on here, I made a couple just to showcase my larger roses and matching cards, then Andy asked me if I was making four. I was confused........I know it doesn't take a lot........not being a Two Ronnies fan it was lost on me, but now I have been fully educated to the meaning of 'fork andles'. So yes Andy, now we have 'fork andles', in fact there were double portions, but a couple of casualties means we are down to six. But plenty of cards, gift boxes, altered tin boxes and all nature of gifty orientated makes.

Allsorts challenge 30

By the time you read this I should be deeply emersed in demonstrationg at Sir Stampalots Big Demo Day........if you live anywhere near or in driving distnace of Peterborough, then it really is the place to be today with lots of different live demonstrations taking place, demo day special offers and refreshments as well.

We had another week of fabulous entries again at Allsorts, it seems you really are enjoying our challenges and we are all so pleased to welcome you each week with your wonderful creations. Gro has selected the theme this week which is "Colours of Advent" where she would like to see the colour purple on your creations. The DT have been treated to images from this weeks sponsor Stretch and Bubbles.

My images from our sponsor are the Christmas tree which I printed three times and glittered liberally using Art Institute dries clear glue and ultra fine glitter. The reindeer was cut from Cricut Christmas Solutions and stamped with Inkadinkado ?? using versafine purple and clear iridescent embossing powder. I used the same stamp and ink to stamp across he corner of the mat which I run through the Bug using the new snow folder. The DP is Daisy Bucket.

Wednesday, 2 December 2009

By the Cute and Girly month 3

By the Cute and Girly and Sir Stampalot Big Demo Day reminder
What a brilliant month it's been at By the Cute and Girly with some absolutely fabulous projects, cards, scrapbook layouts, gift boxes, some knitting all proving what a talented bunch you are.

The host for this month is our teamie Julia who has come up with the great theme of "Lets go to the Movies". Well all of the Inspiration Team really have pulled out the stops here so please do go over to the challenge blog and take a look. There are links to all their blogs so you can check our how they made the creations.

The first one I am sharing with you is my take on my all time movie favourite Gone With the Wind. A adore this movie and watch it at least once a year and often tuck the book in as well.......what a sado I hear you say, but afraid it's never lost it attraction for me and I find it incredible how a movie made in 1939 has such fantastic colour and remains so popular even to those of us who were not even born until years later. I also have a wonderful illustrated book based on the making of the movie which my daughter gave me years ago when she was small and the picture below shows my card laid on an open page of that book where you can see the same picture as the Stampsmith stamp I have used, proving it's creative authenticity.
The main image is 'that kiss ' famous amongst all GWTW fans which they will recognise, with Scarlett still mortified at having to wear mourning black in respect of all those lost at war. But Rhett had just bought her a jaunty little green hat with a feather to cheer her up, which just happened to match the curtains in the background, hence the inspiration for the colour theme of my card.

The image has been simply stamped with black stayzon onto gloss cardstock and a very light colour wash added with Marvy pens. The sentiment, also authentic from the movie to the word is of course what Rhett said to Scarlett just prior to 'the kiss'.........slush, slush I know, but what a love story this one is.

The swirls were cut from Cricut Home Decor, the DP is I believe Fancy Pants and the roses made from the same DP, then lace and cord added.

The rose tutorial I promise is on it's way, I did all the prep work and pictures, but due to my eye op and limited time on the computer have not been able to sit in the glare long enough to bring the post all together. But I promise it won't be long and for anyone able to come to Sir Stampalots Demo Day Saturday, I will be making them all day long.......what a wonderful way to spend the day.

Tuesday, 1 December 2009

Stamping for the Weekend


Big Demo Day coming up and some Birthday Wishes

I am beginning to get really excited about this weekend........Saturday is Sir Stampalots Big Demo Day.......I know I seem to have been harping on about it for weeks, but it really is a very special occasion.......there are not that many craft events outside of the organised shows that have so much going on all in one place. Lots of live demonstrations with plenty of room to watch no less than seven talented ladies, all with very different crafting skills, lots of special offers and refreshment as well.

And I have even more excuse to be excited because I have blogging friends travelling to visit, in some cases quite long journeys, so you can imagine how I am looking forward to meeting some for the very first time.

This card has been created as one of my samples for Saturday following the challenge theme this week at Stamping for the Weekend where they would like to see projects made in "Lilac and Silver with the added option of a gift tag to match".

I have created a frame using Magnolia DP and silver mirri card cutting the apertures with Nesties run through the Bug. The image and sentiment are from the new Rachelle Anne Miller range stamped with versafine black, embossed with detail clear and coloured with Copics. I also added some clouds with chalk, birds, grass and flowers with Art Impression G3234,AA1378 and AA1398. Leaves and flowers are all pounced, the larger leaves using metal and colouring with Alcohol Inks.

Another litte sneak peek for Saturday

A note about the gift tag - the £20 note is not real, a photocopy.......my hubby say's that probably illegal so if I am missing on Saturday you will know why. And before I finish some Birthday wishes - Happy Birthday to Chris (one of super talented ladies who will be sharing our day on Saturday), Vernonique, my beautiful future DIL and George our youngest lab who will be one today.

Monday, 30 November 2009

Penny Black Challenge

Wooo Hoo, I won at the Penny Black's Challenge blog hop. Never entered one before so you can imagine how surprised and excited I was to see I was one of the winners. I get to choose $25 Simon Says products, so a shopping spree awaits.

And this week they have a great sketch to follow. It's not unlike one I quite often use so feel really at home with this one. I have used Daisy Bucket DP's on the base card and inked a mat using my very watery swish and swoosh inky technique with Tim Holtz Frayed Burlap, Peeled Pain and Broken China. The main image is Penny Black 3822K which I stamped with versafie sepia and embossed with detail clear and highlighted with stickles. The sentiment is Stamp by Judith SK-LG-207 and the border and corner punched with Fiskars Threading Water.

Sunday, 29 November 2009

Rosie D's challenge 59

It's time for another challenge at Rosie D's and we have a super prize on offer of a mystery bag of craft goodies for one lucky winner. There is a lovely traditional feel to this challenge - Red, Green and a bit of bling, now how simple is that and the perfect chance to make that extra Christmas card you forgot you needed. I am also entering this card for this weeks Cupcake challenge who have the theme of Red and Green.

I have used one of my favourite images this Christmas from Sarah Kay, stamped and embossed with versafine black and clear embossing powder and coloured with Copics. The DP is from Magnolia Tilda range.......I absolutely adore these DP's, they have a wonderful texture and the colours and designs across the whole range are super........I know I don't do Tilda, but one has to make an exception here.

The little girls coat has been liberally glittered and JudiKins snow glitter added for the ground. The oval is cut with Nesties through the Bug as have the leaves and flowers using Sizzzix dies. I added tiny gold gems to the centre of the flowers, some ribbon and a sentiment from Creative Expression Victorian Christmas sheet.
And just a little taster of the Big Demo Day Saturday at Sir Stampalot......more to come tomorrow.

Saturday, 28 November 2009

Allsorts challenge 29

It was super to see so many of you joining in the fun at Allsorts again this week and so many varied creations for Emma's song title theme. Lots of old favourites, but some new ones as well. Lisa has selected the theme for this weeks challenge and would like to see "Buttons" on your creations. As always it can be a card or any other crafty make, just remember the buttons to be in with a chance of winning the wonderful prize on offer from our sponsors Digisparkle.
I know I said I was done with Christmas cards but I did make this one a couple of weeks ago ready for today. The snowman is Mr Cool, Penny Black 4003H coloured with Copics. The Christmas trees are cut out from JudiKins 2996H which I stamped onto black gloss cardstock and embossed with detail white embossing powder, then decorated the trees with gems, cord and buttons.
The DP is My Minds Eye and the vellum torn across the bottom is Word Prints Scrapbook Sally which is ready embossed with snowflakes. The big snowflake is from the Cuttlebug cut and emboss folder.

Wednesday, 25 November 2009

Challenges

After vowing only this morning that I really had done with Christmas cards and was making no more, here I am back with another.......mind you it's a bit unconventional, but my daughter will adore it and that's just where it will be going.

The theme for this weeks ABC challenge is "I for Indigo" and as I don't work with blue a great deal it's made me step outside my comfort zone a bit which is never a bad thing. I have coupled it with Everybody Art Challenges theme of "Christmas" and Creative Card Crews "Favourite Things"........everyone who know me knows I adore butterflies. Not sure if the finished card is a bit overkill, but my hubby's (who is my main critic) comment was "not in the current run of pile it on crafting". Hmmmmm !

I created a background with Brilliance inks, sky, silver and Mediterranean blue, dabbing them onto a silicone sheet, spritzing with water then whooshing a piece of card around to get a good covering which when dry gives a lovely glistening background to work on. I stamped my image, Penny Black 3896K with versafine blue and embossed with detail clear, then painted the poinsettias with the same brilliance inks. The lovely sentiment is Hero Arts C2604.

The card itself which is pearlescent silver is randomly stamped with Penny Black 3999H using the same blue versafine and embossing with iridescent powder. A piece of pale blue vellum has been laid diagonally across the card because I felt the snowflakes were a bit overpowering. The gorgeous ribbon which has tiny butterflies all over was a present from a great blogging friend......I know you don't like your name in lights, but you know who you are, so thank you mate.

To finish I made up a stick pin with blue and pearl beads and some butterflies punched from vellum. Overkill possibly, but I actually quite like the finished project.