Sunday, 31 January 2010

A Special Challenge and Blog Hop

Don't forget to add you name to this post to be in with a change of winning candy.
Good Morning everybody.

This post is rather different to my normal ones, no card just some very exciting news about something I am thrilled to have been given the opportunity to organise.

On the 1st February there will be a very special ‘One Off Challenge’………with some rather special candy as the main prize. No ordinary candy I can tell you, but a really serious piece of equipment that all of us would love to have in our craft rooms.

I know I am a tease and I will be sharing some sneak peeks of the prizes on offer over the next three weeks........yes ‘prizes’ because as well as the main challenge prize, there will be runners up prizes and a Blog Hop with prizes to be won at each stopping point. And I will also be sharing details of the wonderful sponsors of this challenge and some exciting news about them as well.

But I need you all to help me spread the word and make this as much fun as possible for everyone ........and there is even a prize for doing that. Does this all sound fun or what ? I just know you will all want to get involved and join in so here’s what you need to do now:

1) Give the challenge a plug on your own blog.

2) Add the logo above to your sidebar with a link back here .

3) Link up and leave me a comment on this post to tell me you have done that so I can enter you into the prize draw for this first part of the challenge.......the winner of that prize will be drawn by Random Org on 31st January.

Can you tell I am just a tad excited about this one and I know with your help we are all going to have some real fun.

Saturday, 30 January 2010

Allsorts challenge 37

This post is all scheduled ahead as when it pops up on Saturday morning I should be in deepest Essex for the girls first bridesmaid dress fitting for the May wedding of our second eldest son which is taking place in France.

And I am so thrilled that this week I eventually got my dental work completed and now have three front teeth implants.........that might not sound too exciting, but some of you might remember back last summer and autumn I had lots of problems and a couple of ops on my mouth and they thought I would lose my front teeth. Since then eating has been a nightmare and it's sounded as though I had a serious speech impediment, but several months on, endless hours in the dentists chair and thanks to a wonderful consultant I am all sparking white again.

So on to the serious stuff of crafting and exciting happenings at Allsorts challenge this week. We were all sorry to see our team mate Gro leave us, she has been with us from the start and we will all miss her inspirational work. But this means we have a vacancy, so this weeks challenge is also a DT call, our very first one since the challenge started last May.

There is a sketch to follow this week and I have used it as an opportunity to ink up another of my new Hero stamps for the long overdue samples I am supposed to be making for Sir Stampalot.

I have used this lovely stamp Hero K5313 Silhouette Ivy which I stamped onto a piece of silk card using new Hero Chalk Inks Punch and Grass. The background panel is stamped with good old faithful Hero H2065 Old French Writing again with the grass ink. The DP used for the red panels is Doodlebug and the sentiment Hero CL273 Great Flourishes. I punched the edge of my stamped piece with the zutter and tied ribbons through the holes.

Before I go, have you entered your name for the candy in the post at the top of my blog........just one day to go until I announce the Special Challenge and Blog Hop and the fabby candy on offer.

Friday, 29 January 2010

Polkadoodles 4

The new challenge at Polkadoodles this week has been set by my teamie Kerry who would like to see Valentines cards made with non tradition colours.

Before I move on to my card I need to remind you all that there are still a couple of days left to enter the candy draw at the top of my blog. The winner will be announced on Monday 1st February........the day our Special Challenge and Blog Hop goes live. So much candy on offer that you won't want to miss out on this one and of course be part of the fun.

Now for my card, I have used the Elegance section of the new Love and Romance CD. The main image was cut with Nesties, inked with versamark and embossed with iridescent powder, then layers onto to more mats cut on the Big Shot Express. I made three roses with paper from the same collection and added some punched leaves and pearls to finish and an 'I love you sentiment'.

Wednesday, 27 January 2010

Have you added your name for candy ?

Well folks, just four days to go until lift off.........of course I mean your chance to win some of the mega candy on offer in the Special One Off Challenge and Blog Hop.......all prized of course coming from the challenge sponsors Sir Stampaot.

The last week or so seem to have flown by with all this organising and I appear to have turned into a very bad blogger missing so many of your posts, so apologies but I should soon be back to normal because on Monday I will be officially posting the challenge and introducing you to my very talented Honorary Design Team........we rather liked the sound of that and it has sort of stuck.

So I hope we will be seeing lots of you entering and myself and the DT are so looking forward to visiting all your blogs to see what creations you come up with for the great theme that Andy and Janice at Sir Stampalot have chosen for us.......no, I'm not telling what the theme is until Monday.......I know I'm a real spoil sport. And don't forget there is still time to enter the candy on offer on the post at the top of my blog which will drawn by Random Org on Sunday night.

So on to a card that I have made for this weeks Everybody Art Challenges which has a colour combo of 'Brown, Blue and White'. A chance to use some more of my new Hero stamps, this time CL375, Big Flowers and CL278 Great Flourishes. I stamped the flowers and leaves onto a piece of brown Bazzil cardstock, using versamark and detail clear embossing powder, masking some of them as I stamped, then bleaching out the flowers and leaves.

I coloured with Twinkling H2o's and added punched circles to the centres which I glittered with crystal glitter. The sentiment is stamped with versfaine blue and embossed with detail clear.

Monday, 25 January 2010

Moons, suns and masking turotial

I have been asked several times if I will do a tutorial to explain in a bit more detail how I create some of my backgrounds. Most of what am going to show here is what I have picked up over the years from various sources and I am not trying to teach anyone to suck eggs........but going back a few years I would have loved to discover how to achieve certain things. Therefore I hope this might help some of you and as with all things crafty I have made little changes over the years to fit with what I am trying to create.

The first technique is to create a simple sun, but equally it could be a moon with a change of ink colours. Basic materials: Ink, preferably two shades of the same colour ink or similar colourways to add definition and to help build the image. For a moon a blue and silver work well. I always use either Tim Holtz distress inks or a chalk based ink such as the Hero range. Make up sponge and your mask which is a piece of paper or card with a circle punched out.
Lay your mask over the piece of card you want to use for your project. Take the make up sponge and roll into your fingers as shown below. By rolling it you avoid any edges and will get a smoother finish without any harsh lines.
Tap the rolled sponge into the lightest colour ink first, dab onto a piece of scrap paper first to remove excess ink, then tap gently round the edges of the circle, slightly firmer near the edges - I never go right into the centre of the circle with ink as this gives a more graduated finish (example). Follow the same process with the darker ink until you are happy with the shading.
Lift the mask off, allow to dry for 5/10 minutes, or give a blast with your heat gun, then you are ready to stamp your images.
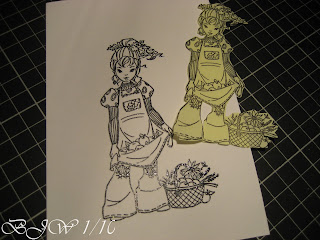
The next technique takes it a step further as you create a mask for your sun/moon and image. This is useful if you want to use very light colours for colouring your image as there is no underlying colour to conceal.

Stamp (and emboss if you wish) your image onto a piece of good quality cardstock. Stamp it a second time onto a post it note, piece of paper or if you are really posh masking paper !

Cut our the second image and lay it over the main image, then lay your mask (sheet of paper with the circle cut out) over the image where you want to see the sun/moon. Follow exactly the same process as the first technique above. Lift of both the circle mask and the main image one and you are left with the sun/moon behind your image.

Basic brayering technique. There is no limit to how far you can take brayering and some wonderful effects can be created, but here I will stick to the sun/moon again with a few hills thrown in for good measure. Basic materials: Ink pad, big and juicy are by far the best as apart from the blend of colours, they are large enough to accommodate the brayer - I always use a speedball brayer as they are soft and give a nice even finish. A circle - paper rather than card is best as it is less likely to give off shadows as you roll the brayer across. Non permanent glue. Gloss cardstock - in my view essential as a matt cardstock can absorb the ink, is harder to work with and is less likely to give an even finish.

Place the circle onto the gloss cardstock roughly where you want to see it on your finished project attaching it with the non permenant glue which will gently rub off yur cardstock when you have finished. Gently roll your brayer back and forth over the inkpad, ensuring you keep it to the same area - if you move it sidewards too far you will contaminate the colours. When it is covered roll it briskly over a piece of scrap paper to remove the excess - this might seem wasteful but you need to start with a lighter tone - you can always add more, you can't take it away once it's on your cardstock.

Once you have removed the excess you need to do a wheelie - assuming you are starting to brayer the top half of your piece first (and right handed) you will need to do the wheelie on the left hand side of the brayer. This removed the ink from the edge and will prevent lines in the middle of your cardstock.
Gradually build the colours up with light movements drawing the brayer towards you. When you are happy with the colour, turn your cardstock round so the bottom becomes the top temporarily (there will be no ink on that part yet) then continue with the same process and you will end up with graduated colours over your whole piece.

Next tear a piece of plain paper, lay it over your brayered piece, ink up your brayer again and remove the excess and brayer more ink across the top of your piece of cardstock (part of your brayer will be inking the piece of paper). Move the paper down and repeat and you will see your hills building.

This picture is pretty poor as I did the photos under my daylight lamp, but the hills are just visible. These are clearer.

Remove the mask from the sun/moon. Scrunch up a piece of plain paper, ink up your brayer, take off the excess ink, do a wheelie on the left side again then roll with a fairly hard movement over the piece of scrunched up paper. Run the brayer over the top half of the card and you will create a clouded effect over the sun/moon - just about visible in the picture. The same technique gives great water effects if you want to create water/sea (see here).

I really do hope this makes sense, not the easiest thing to explain on paper, so as always any questions just yell.

Sunday, 24 January 2010

Rosie D's challenge 63

Over at Rosie D's challenge we have a new challenge for you and a great sketch from our very own Rosie.........really enjoyed working with this one Rosie. The DT were also treated to images from this weeks sponsor Teri at Delicious Doodles and this weeks winner will be getting some images of their own to play with.

I printed the heat and ribbon image three times onto DP from the new Polkadoodle Love Marriage and more CD, but them out and gently shaped them to give a cushion effect before building up with silicone. I added a rose made from the same DP to the centre, liberally glittering both the image and rose.

The ovals were cut with Nesties through the Big Shot and placed inside the double aperture which I cut on Cricut Storybook. The simple 'I love you' greeting is Penny Black 3322D stamped onto a ribbon slide created with a Nestie and threaded with organza ribbon.

Saturday, 23 January 2010

Allsorts week 37

Saturday folks and a new challenge at Allsorts and this week our teamie Lisa has chosen the theme "Hearts and Flowers", so if you still have that special Valentines card to make here's your opportunity.
For my card I created a template on the Cricut using Home Decor and Plantin Schoolbook, welding the elements together on the DS so that there was a leading edge which I could punch with the Zutter to hold the three layers together. The DP's which are all from the New Love Marriage and More Polkadoodles CD were cut in the same way and stuck to the cardstock. Roses, well yes more of them (tutorial here)........ but this is a Valentines card, which I embossed roud the edges with Judikins garnet embossing powder. I added some hearts cut with my new Martha Steward punch........you need strong wrists with this one, it weighs a ton, but is is sooooo pretty plus lace and ribbon to decorate.